How to use a table saw — what causes kickback, why the riving knife matters, and the setup habits that make every cut safe and accurate.
The table saw is the most capable tool in a woodshop and the one that demands the most respect. It rips boards to width, cuts sheet goods, makes joinery, and does it all with an accuracy no handheld tool matches.
It also has one specific failure mode you need to genuinely understand: kickback. Not as a vague warning, but as a mechanism — because once you know what causes it, every safety rule stops being an arbitrary instruction and starts making obvious sense.
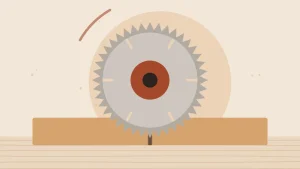
Here it is in one sentence. The back half of the blade spins upward, toward you. If the wood ever touches those rising teeth, they grab it and throw it back at you at speed.
That is it. Every table saw safety device and technique exists to stop wood contacting the rising rear teeth. This guide explains how to make sure it never does. 💡
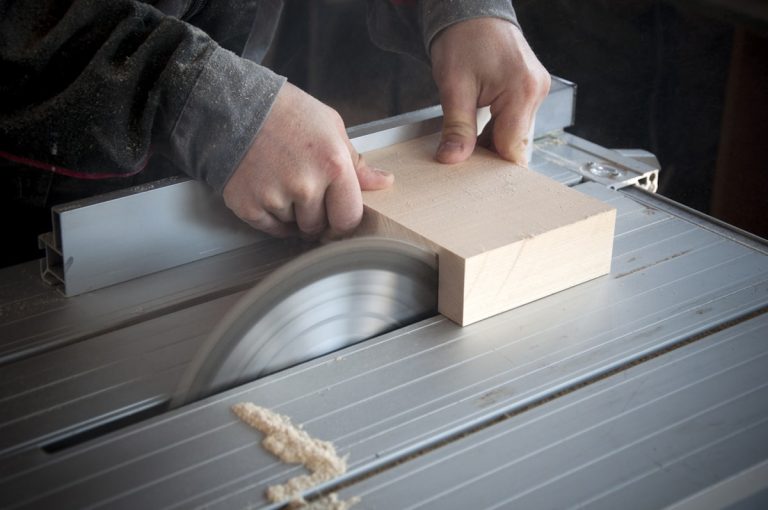
Alt text: “Table saw ripping a board with riving knife, featherboard against the fence and a push stick guiding the workpiece”
- Kickback: what actually happens
- The riving knife and guard
- Setting the saw up correctly
- Making a rip cut
- Crosscutting safely
- The rule people break most
- Blade height — the honest answer
- Push sticks, blocks and featherboards
- Small and thin pieces
- Common mistakes (and how to fix them)
- Pro tips worth knowing
- What I recommend
- Frequently asked questions
- Your final checklist
Kickback: What Actually Happens
A table saw blade spins toward you at the front and away from you at the back. At the front of the blade, the teeth come down through the wood and press it against the table — helpful. At the back, the teeth are travelling upward and toward you.
If the workpiece contacts those rising rear teeth, they lift it and hurl it backward. The board leaves at high speed, and your hands, which were pushing it forward, can be pulled into the blade as it goes.
The four ways wood reaches the rear teeth
| Cause | What happens | Prevention |
|---|---|---|
| Pinching | The cut closes on the blade | ✅ Riving knife |
| Twisting away from the fence | Board rotates into rear teeth | ✅ Featherboard, firm pressure |
| Internal stress in the timber | Board springs closed mid-cut | ✅ Riving knife; watch the kerf |
| Trapped offcut | Piece wedged between blade and fence | ⚠️ Never trap the offcut |
| Freehand cutting | Nothing controls the board | ❌ Always use fence or sled |
| Misaligned fence | Board driven into the blade | ✅ Check fence is parallel |
Internal stress deserves a note, because it surprises people. Timber holds tension from how it dried. When you rip a board, you release that tension and the two halves can spring — sometimes closing hard onto the blade behind the cut. You cannot predict it from looking at the board. This is precisely what a riving knife prevents.
Kickback is not random and it is not bad luck. It is wood touching the rising rear teeth. Every rule in this guide exists to prevent that one contact — which is why the rules are worth following even when a cut seems trivial.
The Riving Knife and Guard
The riving knife is the single most important safety device on a table saw, and it is the one people most often remove and never put back.
It is a curved metal fin mounted directly behind the blade, the same thickness as the blade plate, that rises and tilts with the blade. It sits in the kerf you have just cut and physically prevents the wood closing onto the back of the blade.
| Device | What it does | Keep it fitted? |
|---|---|---|
| Riving knife | Holds the kerf open behind the blade | ✅ Always |
| Splitter | Older fixed version of the same idea | ✅ Yes, if that is what you have |
| Blade guard | Covers the blade, deflects chips | ✅ Whenever the cut allows |
| Anti-kickback pawls | Toothed arms that dig in if wood moves back | ✅ Useful backup |
| Low-profile riving knife | Sits below blade top for non-through cuts | ✅ For grooves and rebates |
Setting the Saw Up Correctly
An out-of-alignment saw is not just inaccurate — it actively causes kickback by steering the board into the blade.
1. Blade parallel to the miter slot
This is the foundation. Measure from the miter slot to a marked tooth at the front of the blade, then rotate that same tooth to the back and measure again. The two measurements must match. If they do not, the blade is skewed and every cut fights you.
2. Fence parallel to the blade
Once the blade is parallel to the slot, set the fence parallel too. A fence that toes in toward the blade at the back is dangerous — it squeezes the workpiece into the rear teeth. Some woodworkers set a very slight toe-out at the back; dead parallel is the safe default.
3. Riving knife aligned
It must sit centred in line with the blade, not offset to either side. An offset knife pushes the board sideways.
4. Flat, stable, right height
The saw must not rock. Table height around hip level suits most people for controlled pushing.
5. Outfeed support
You need somewhere for the board to go. A board that drops off the back as you finish the cut tips up into the blade. A roller stand or outfeed table at exactly table height is essential for anything long.
6. Clean table, sharp blade
Wax the table so wood slides freely — friction makes you push harder and control less. And a dull blade needs more force, burns, and is more likely to bind.
Making a Rip Cut
Ripping means cutting along the length of a board to make it narrower. It is the table saw’s main job.
Step 1 — Set the fence
Measure from the fence to a blade tooth, not to the blade plate — teeth are set wider. Lock the fence and check it is locked at both ends if your saw has a rear lock.
Step 2 — Set the blade height
See the section below. Set it, then lock it.
Step 3 — Check the board
It needs one straight edge to run against the fence and a flat face to sit on the table. A bowed or twisted board is unsafe to rip — flatten one face and straighten one edge first, or use a circular saw with a guide instead.
Step 4 — Position yourself out of the line of fire
Stand slightly to the side of the blade, not directly behind it. If kickback happens, the board travels straight back along the line of the blade. Standing off to one side means it misses you.
Step 5 — Set featherboards
A featherboard before the blade holds the board against the fence, so it cannot drift. Fit it in front of the blade, never beside or behind it — pressure beside the blade pinches the cut closed.
Step 6 — Start the saw and let it reach speed
Step 7 — Feed steadily
Push forward with even pressure, keeping the board tight against the fence and flat on the table. Steady is better than fast or slow — hesitating causes burn marks.
Step 8 — Switch to a push stick
As your hand approaches the blade, change to a push stick or push block. Push the piece all the way past the blade and the riving knife before letting go.
Step 9 — Switch off before clearing
Never reach over or behind a spinning blade to retrieve an offcut. Switch off, wait for it to stop, then clear.
Crosscutting Safely
Crosscutting means cutting across the board’s width. On a table saw this needs a miter gauge or a crosscut sled — never the fence alone.
Miter gauge
Runs in the slot and pushes the board past the blade. Fine for narrow stock. Add a long auxiliary fence to the gauge for better support.
Crosscut sled
A sled is a plywood platform with runners in both miter slots and a fence across the back. The whole thing — sled and workpiece together — slides past the blade.
A sled is the single best upgrade to a table saw. It supports the workpiece completely, holds it square, backs up the cut to prevent tearout, and keeps your hands well away. It is also an excellent early project.
The Rule People Break Most
This gets its own section because it causes so many accidents and looks perfectly reasonable to a beginner.
The correct way to cut repeat lengths: clamp a stop block to the fence well before the blade, so the board leaves the block before the cut begins. The offcut is then free at the moment of separation. Or use a stop block on a crosscut sled fence, which does the same thing more conveniently.
Two more rules in the same family:
- Never cut freehand. Every cut needs the fence, the miter gauge or a sled. A board guided only by hand will rotate into the blade.
- Never cut a board that is not flat. A rocking board pivots into the rear teeth.
Blade Height — The Honest Answer
Ask five woodworkers how high the blade should be and you will get a real debate. Both positions have genuine logic.
| Low (just above the wood) | High (teeth well clear) | |
|---|---|---|
| Exposed blade | ✅ Less | ⚠️ More |
| Cutting force direction | More forward | ✅ More downward |
| Kickback tendency | Slightly higher | ✅ Slightly lower |
| Injury if contact occurs | ✅ Shallower | ⚠️ Deeper |
| Cut quality | Good | ✅ Often cleaner |
| Heat and burning | More teeth in the cut | ✅ Less |
The reasoning behind each: a higher blade means the teeth enter the wood at a steeper angle, so more of the cutting force pushes the board down onto the table rather than back toward you. That reduces kickback tendency. But more blade is exposed, so if your hand does reach it, the injury is worse.
The common compromise is roughly a quarter of an inch — about 6mm — of blade above the workpiece. Enough that the gullets clear chips and the force is mostly downward, without a large amount of blade exposed. That is a sensible default, and it is what most guidance recommends.
What matters more than either choice: using the riving knife, using push sticks, and standing out of the line of fire. Blade height is a genuine trade-off; those three are not.
Push Sticks, Blocks and Featherboards
| Aid | What it does | Use it when |
|---|---|---|
| Push stick | Pushes from behind | ✅ Narrow rips |
| Push block | Pushes down and forward | ✅ Wider boards, better control |
| Featherboard | Holds work against the fence | ✅ All rip cuts |
| Crosscut sled | Carries work past the blade | ✅ All crosscuts |
| Outfeed support | Stops the board dropping | ✅ Anything long |
| Bare hands near the blade | — | ❌ Never |
Push blocks beat push sticks for most work. A stick pushes only from behind, which can let the board lift or drift. A block sits on top and presses down as well as forward, giving far more control — and keeping your whole hand above the workpiece rather than beside the blade.
Featherboards are underrated. Angled flexible fingers press the board against the fence and allow movement forward but resist movement back. That means consistent pressure that never tires, and an extra layer of anti-kickback protection.
Critical placement rule: featherboards go in front of the blade, never beside or behind it. Pressure applied alongside the blade squeezes the freshly cut kerf shut against the teeth — creating exactly the pinch you are trying to avoid.
Small and Thin Pieces
Small workpieces are the hardest table saw problem, because there is nowhere safe to put your hands.
- Cut small parts from a larger board where possible, rather than handling small pieces. Cut the joinery first, then cut the piece free.
- Use a sled with a hold-down for small crosscuts.
- For thin rips, use a thin-rip jig so the narrow strip falls on the outside of the blade rather than being trapped between blade and fence.
- Consider a different tool. A band saw or a hand saw is often the right answer. There is no obligation to make every cut on the table saw.
- Never push a small piece with your fingers, however brief the cut.
The thin-rip point is worth understanding. If you set the fence very close to the blade, the narrow strip is trapped in the gap and can be picked up by the rear teeth. Setting up so the offcut falls away on the far side removes that risk entirely.
Common Mistakes (And How to Fix Them)
Mistake 1 — Removing the riving knife and not replacing it
The fix: refit it immediately after any non-through cut. It is the main defence against kickback.
Mistake 2 — Using the fence and miter gauge together
The fix: a stop block clamped well before the blade, so the offcut is free when it separates.
Mistake 3 — Standing directly behind the blade
The fix: stand slightly to one side. Kickback travels straight back.
Mistake 4 — Featherboard beside or behind the blade
The fix: in front of the blade only. Beside it, you are pinching the kerf shut.
Mistake 5 — Cutting freehand
The fix: always fence, miter gauge or sled. Never hand-guided.
Mistake 6 — Ripping a bowed or twisted board
The fix: straighten one edge and flatten one face first, or use another tool.
Mistake 7 — No outfeed support
The fix: roller stand or outfeed table at exactly table height.
Mistake 8 — Reaching over a spinning blade
The fix: switch off, wait for the blade to stop, then clear offcuts.
Mistake 9 — Wearing gloves or loose sleeves
The fix: bare hands, rolled sleeves, no jewellery or lanyards.
Mistake 10 — Never checking blade and fence alignment
The fix: check the blade is parallel to the miter slot and the fence parallel to the blade. Misalignment causes kickback, not just inaccuracy.
Pro Tips Worth Knowing
- Build a crosscut sled early. It is the best accuracy and safety upgrade, and it costs a sheet offcut.
- Make a zero-clearance insert. A throat plate with a slot cut by the blade itself supports the fibres right at the cut, eliminating tearout and stopping thin offcuts falling into the machine.
- Wax the table with paste wax. Wood slides with far less effort, which means better control and less pushing force.
- Keep push blocks hanging on the saw, not in a drawer. If they are not to hand you will use your hands.
- Watch the kerf behind the blade while ripping. If it visibly closes on the riving knife, the timber is stressed — stop, switch off, and reassess.
- Listen to the motor. Bogging down means you are feeding too fast or the blade is dull.
- Burn marks mean something. Usually a dull blade, a misaligned fence, or hesitating mid-cut.
- Unplug before changing a blade. Not just switched off — unplugged.
- Table saws produce a great deal of fine dust. Connect extraction and see our guide on wood dust safety.
- If a cut feels wrong, stop. Switch off, let everything come to rest, and rethink the setup. That instinct is worth trusting.
What I Recommend
The accessories that keep your hands away from the blade and the board against the fence do more for both safety and cut quality than any upgrade to the saw itself. They are also the things most people never get round to buying.
POWERTEC 71718 Safety Kit with Deluxe Featherboard
🏆 Best Safety UpgradeA featherboard and push accessory kit for table saws, router tables, jointers and band saws. The featherboard applies constant pressure toward the fence so the board cannot drift into the rear teeth, and the push accessories keep your hands above the work instead of beside the blade.
- ✅ Constant fence pressure that never tires — the main defence against a board drifting
- ✅ Resists backward movement, adding a second layer of anti-kickback protection
- ✅ Keeps hands well clear of the blade on narrow rips
- ✅ Improves cut quality too — consistent pressure means no burn marks or wander
- ✅ Works across several machines, not just the table saw
Prices and availability change often — check Amazon for the current price.
Frequently Asked Questions
What causes table saw kickback?
Wood contacting the rear of the blade, where the teeth are rising upward and toward you. That happens when the cut pinches closed on the blade, when the board twists away from the fence, when internal stress in the timber makes it spring shut, when an offcut is trapped between blade and fence, or when cutting freehand with nothing guiding the board. A riving knife prevents most of these by holding the kerf open behind the blade.
Can I use the rip fence as a stop for crosscuts?
No — this is one of the most dangerous things you can do on a table saw. The offcut gets trapped between the blade and the fence with nowhere to escape, binds, and is thrown back at speed. Instead, clamp a stop block to the fence well before the blade so the board has left the block before the cut starts, or use a stop block on a crosscut sled.
How high should the blade be?
Around a quarter of an inch — roughly 6mm — above the workpiece is the usual recommendation and a sensible default. A higher blade directs more of the cutting force downward, which slightly reduces kickback tendency, but exposes more blade so any contact is worse. A lower blade exposes less but pushes more of the force back toward you. It is a genuine trade-off; the riving knife, push sticks and standing out of the line of fire matter more.
Do I really need the riving knife?
Yes. It is the single most effective anti-kickback device, and it does not interfere with normal cutting because it moves with the blade and sits in the kerf you have already made. It has to be removed for non-through cuts like grooves, and that is exactly when it gets left off. Refit it before your next rip. Many saws also offer a low-profile knife that can stay fitted for non-through cuts.
Where should I stand when using a table saw?
Slightly to one side of the blade, not directly behind it. If kickback occurs, the workpiece travels straight back along the line of the blade — standing off to the side means it passes you rather than hitting you. Keep your body out of that line for the whole cut, including while you finish pushing the piece through.
Why is my cut burning the wood?
Usually a dull blade, a fence that is not parallel to the blade, or hesitating during the cut. A dull blade rubs instead of cutting and generates heat. A misaligned fence forces the board against the blade’s side. Pausing mid-cut lets the blade spin against one spot. Check alignment, fit a sharp blade, and feed at a steady continuous rate.
Your Final Checklist
- Riving knife fitted and aligned with the blade
- Guard and pawls fitted whenever the cut allows
- Blade parallel to the miter slot, fence parallel to the blade
- Blade about 6mm above the workpiece, locked
- Sharp blade, clean waxed table
- Eye and ear protection on, gloves off, sleeves rolled
- Outfeed support at exactly table height
- Board flat with one straight edge against the fence
- Featherboard in front of the blade, never beside it
- Stand slightly to one side of the blade line
- Never fence and miter gauge together — stop block well before the blade
- Never cut freehand
- Push stick or block as hands approach the blade
- Push fully past the blade and riving knife before releasing
- Switch off and wait before clearing offcuts
Next in this series: how to use a miter saw and how to use a circular saw.