How to use a band saw — blade choice, tension and tracking, understanding drift, and resawing thick stock.
The band saw is the most useful machine in a small workshop and the one people are least afraid of, for a very good reason: the blade travels downward through the cut.
Every tooth is moving down toward the table, pressing the workpiece onto it. There is no rising edge to catch the wood and throw it, which means a band saw does not kick back the way a table saw does. You still have to keep your fingers away from a moving blade, but the violent, unpredictable failure mode simply is not there.
It also does two things nothing else does well: it cuts curves in thick material, and it resaws — slicing a board through its thickness to make two thinner boards from one.
The catch is that a band saw needs setting up. An untuned band saw cuts badly, wanders, and breaks blades, and most people blame the machine. Nearly always it is tension, tracking, guides — or a thing called drift. 💡
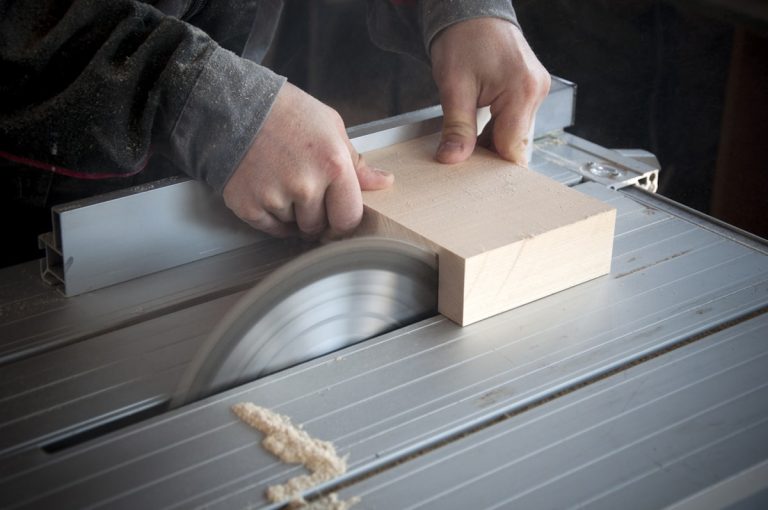
Alt text: “Band saw resawing a thick board against a tall fence with the blade guard set close to the workpiece”
- What a band saw does best
- Choosing the blade
- Blade width and curve radius
- Tension and tracking
- Setting the guides
- Drift — the thing nobody explains
- Step by step
- Cutting curves and relief cuts
- Resawing
- Safety on a band saw
- Common mistakes (and how to fix them)
- Pro tips worth knowing
- What I recommend
- Frequently asked questions
- Your final checklist
What a Band Saw Does Best
| Job | Band saw? | Why |
|---|---|---|
| Curves in thick stock | ✅ Best tool | A jigsaw cannot manage the depth |
| Resawing boards | ✅ Only practical tool | Thin kerf, full depth |
| Cutting small parts safely | ✅ Excellent | No kickback |
| Rough-cutting shapes | ✅ Ideal | Fast and controllable |
| Cutting round stock | ✅ Safe with a V-block | Downward cutting force |
| Long straight rips in sheets | ⚠️ Awkward | Table saw or circular saw |
| Very fine finish cuts | ⚠️ Rough | Expect to sand or plane after |
Resawing is the headline feature. Because the blade is thin, you lose very little material to the kerf — so a thick board can be split into two usable thinner boards, or into book-matched panels. Nothing else in a small workshop does this.
The safety point deserves repeating. A band saw’s cutting force presses the work down onto the table. That makes it the tool of choice for small parts, awkward shapes and round stock — situations that are genuinely risky on a table saw. See our guide on table saw safety for the contrast.
Choosing the Blade
The blade determines almost everything about how a band saw performs. Three variables matter.
| Blade | TPI | Best for | Finish |
|---|---|---|---|
| 1/8″–3/16″ | 14–24 | ✅ Tight curves, scrollwork | Good |
| 1/4″ | 6–14 | ✅ General curves — the all-rounder | Good |
| 3/8″ | 4–6 | Gentle curves, general cutting | Moderate |
| 1/2″ | 3–4 | ✅ Straight cuts, light resawing | Rougher |
| 3/4″–1″ | 2–3 | ✅ Resawing thick stock | Rough |
| Skip / hook tooth | Low | ✅ Thick timber — clears waste | Rough but fast |
The rule for TPI: thicker material needs fewer teeth. A fine blade in thick timber clogs with sawdust, overheats and burns, because the small gullets between teeth cannot carry the waste out of a deep cut. As with other saws, aim for at least three teeth in the material — but in thick stock, err toward coarse.
If you keep one blade on the machine, a 1/4″ blade around 6 TPI is the most useful compromise — it cuts reasonable curves, handles general work, and copes with moderate thickness.
Blade Width and Curve Radius
This is a genuine physical limit, not a technique issue. A wider blade cannot turn a tighter corner, because the back of the blade binds against the wood on the inside of the curve.
| Blade width | Roughly the tightest radius | Use for |
|---|---|---|
| 1/8″ | ✅ Very tight | Scrollwork, small detail |
| 3/16″ | Tight | Detailed curves |
| 1/4″ | ✅ Moderate | Most furniture curves |
| 3/8″ | Gentle | Sweeping curves |
| 1/2″ | ⚠️ Very gentle only | Near-straight work |
| 3/4″+ | ❌ Straight only | Resawing |
If you force a wide blade round a tight curve, the blade twists in the cut, the back edge burns and binds, and you risk pulling the blade off the wheels. If the curve is too tight for your blade, either fit a narrower one or use relief cuts — covered below.
Tension and Tracking
These two setup steps cause most band saw complaints.
Tension
A band saw blade must be under real tension to cut straight. Too little and it wanders, bows in the cut, and produces a barrelled surface when resawing.
Most saws have a tension scale marked with blade widths. It is a starting point, though scales are often approximate — many woodworkers find they need slightly more tension than the gauge suggests, particularly for resawing.
A practical check: with the guides backed off, press the side of the blade with a finger. It should deflect only slightly. A blade you can push sideways easily is too loose.
Tracking
Tracking is where the blade sits on the wheels. Band saw wheels are slightly crowned — higher in the middle — and the blade should sit centred on that crown.
- Unplug the machine.
- Open the wheel covers and back the guides right off.
- Turn the upper wheel by hand and watch where the blade sits.
- Adjust the tracking knob — it tilts the upper wheel — until the blade runs centred and stays there.
- Close up, plug in, and run briefly to confirm it stays put.
Some woodworkers track the blade so the teeth (the gullets) sit just off the front of the crown rather than dead-centre. Both approaches work; consistency matters more than which you choose. If the blade drifts off the wheel, tracking is the first thing to check.
Setting the Guides
Guides support the blade against side and rear forces. There are two sets — above and below the table — and both need setting.
- Side guides (blocks or bearings) — set them just behind the gullets, so they support the blade body but do not touch the teeth. Teeth running against guides get destroyed.
- Clearance — a whisker of gap, roughly the thickness of a piece of paper, on each side. Close enough to support, not so close they grip.
- Thrust bearing — sits behind the blade and takes the backward push when you feed. Set it just clear of the blade at rest, so it only makes contact under cutting load.
- Do both sets. The lower guides under the table are the ones people forget, and they matter just as much.
Blade guard height
Set the upper guide assembly so it sits just above the workpiece — around 6mm clear. This does two things: it covers the maximum amount of blade, which is the safety benefit, and it minimises the unsupported length of blade, which is the accuracy benefit. A guard left high wanders and is dangerous.
An hour spent tensioning, tracking and setting guides turns a frustrating band saw into a precise one. Most people who dislike their band saw have never done it — and are fighting a setup problem they have mistaken for a machine problem.
Drift — The Thing Nobody Explains
You set the fence perfectly parallel to the blade, start a rip, and the wood insists on angling away. You fight it, the cut wanders, and you conclude the saw is broken.
It is not. This is drift, and it is normal.
What causes it: a band saw blade is not perfectly symmetrical. Tooth set varies slightly side to side, the weld is a small irregularity, and the blade is under tension between two wheels. The result is that most blades naturally cut at a very slight angle to the machine’s true fore-and-aft line. That angle is the drift angle, and it is specific to each individual blade — change the blade and it changes.
How to find your drift angle
- Draw a straight line down a scrap board, parallel to its edge, a couple of feet long.
- Cut freehand along that line, ignoring the fence entirely, letting the board find its own natural angle. Concentrate on staying on the line, not on where the board points.
- Stop halfway with the blade still in the cut, and hold the board still.
- Pencil a line on the table along the edge of the board.
- That line is your drift angle. Set the fence parallel to it, not to the blade.
With the fence set to the drift angle, the board runs true against it and the cut comes out straight and parallel.
The simpler alternative: a point fence
Instead of chasing drift, many woodworkers use a point fence — a fence with a rounded or pointed contact face, positioned level with the blade teeth. Because it contacts the workpiece at a single point rather than a long face, the board can pivot slightly and you steer it by eye along your marked line.
This is often the better approach for resawing, because it accommodates drift automatically and lets you correct as you go. The trade-off is that it needs more attention — you are steering rather than just pushing.
| Fence set to drift | Point fence | |
|---|---|---|
| Setup time | ⚠️ Test cut needed per blade | ✅ None |
| Repeatability | ✅ Excellent | Depends on you |
| Handles blade changes | ⚠️ Must re-test | ✅ Automatically |
| Correcting mid-cut | ❌ No | ✅ Yes |
| Best for | Repeat rips | ✅ Resawing |
Step By Step
Step 1 — Fit the right blade
Width for the tightest curve you need; TPI for the thickness.
Step 2 — Tension it
To the scale for that width, checking by deflection.
Step 3 — Check tracking
Unplugged, wheel turned by hand, blade running centred.
Step 4 — Set both sets of guides
Side guides just behind the gullets with paper-thin clearance; thrust bearings just clear at rest.
Step 5 — Check the table is square to the blade
A small engineer’s square against the blade body. Adjust the table stop if needed.
Step 6 — Set the guard height
Just above the workpiece — about 6mm.
Step 7 — Find drift if you are using a fence
Test cut on scrap, mark the angle, set the fence to it.
Step 8 — Plan the cut
Look at the shape and work out where you will run out of room. Plan relief cuts before you start.
Step 9 — Feed steadily
Let the blade cut. Forcing bows the blade and gives a barrelled surface.
Step 10 — Keep fingers clear and use a push stick
Especially as you approach the end of a cut.
Step 11 — Do not back out of a curved cut while running
See safety below — this is how blades come off wheels.
Cutting Curves and Relief Cuts
The band saw’s other speciality. A few techniques make it far easier.
Relief cuts
For any curve tighter than your blade can comfortably manage, cut relief cuts first. These are straight cuts from the edge of the board in to the waste side of your curve line, spaced along the curve. As you then cut the curve, the waste falls away in sections instead of binding against the blade.
This is the single most useful curve-cutting technique, and it turns impossible curves into easy ones.
Nibbling corners
For a sharp internal corner, make several straight cuts into the waste to remove material, then clean up the corner with a chisel or a file. See our guide on using a chisel.
Cut on the waste side
Leave the line, then sand or file to it. An oscillating spindle sander is the natural partner to a band saw for exactly this.
Turn gently
Rotate the workpiece smoothly rather than forcing it round. If the blade starts to twist or the back edge burns, the curve is too tight.
Round stock needs a V-block
Never cut a dowel or round bar resting loose on the table — it will roll and spin. Cradle it in a V-shaped jig.
Resawing
Splitting a board through its thickness. It needs the machine set up well, but the payoff is real — one thick board becomes two thin ones with very little waste.
- Use the widest blade your saw takes, with low TPI and deep gullets — a skip or hook tooth pattern.
- Tension it properly. This is where under-tension shows most, as a bowed, barrelled cut.
- Make sure one face and one edge are true before you start. A twisted board cannot be resawn accurately — see our guide on using a thickness planer.
- Set the guard just above the board — with a tall board this is a long span of blade, so support matters.
- Use a tall fence set to drift, or a point fence.
- Feed slowly and steadily. Resawing removes a lot of material; rushing bows the blade.
- Use a push stick at the end, and support long boards with a stand.
- Expect to plane or sand afterwards. The resawn face will be rough.
Safety on a Band Saw
Safer than a table saw, but not safe. The hazards are different rather than absent.
- Fingers are the risk. There is no kickback, but the blade will cut you as readily as the wood. Keep hands to the sides of the blade line, never in front of it.
- Never reach across or behind the blade to hold or retrieve anything.
- Use a push stick as the cut finishes.
- Set the guard just above the work so the minimum blade is exposed.
- Do not back out of a curved cut with the saw running. Reversing out of a curve can pull the blade off the wheels. Switch off, let it stop, then withdraw — or cut out to the edge through the waste.
- The blade keeps moving after switch-off, often for a while. Wait for it to stop completely.
- Unplug before opening covers or changing blades.
- Handle blades carefully. A coiled band saw blade under tension can spring open unexpectedly — wear gloves and keep your face away when uncoiling one.
- Eye protection and dust extraction. Band saws throw dust downward and produce plenty of it.
Common Mistakes (And How to Fix Them)
Mistake 1 — Blaming the saw for drift
The fix: find the drift angle and set the fence to it, or use a point fence. It is normal blade behaviour.
Mistake 2 — Not enough tension
The fix: tension to the scale and check by deflection. Under-tension causes wandering and barrelled resaw cuts.
Mistake 3 — Guides set wrong or not set at all
The fix: both sets, just behind the gullets, paper clearance, thrust bearing just clear.
Mistake 4 — Guard left high
The fix: about 6mm above the work. Safer and more accurate.
Mistake 5 — Too wide a blade for the curve
The fix: narrower blade or relief cuts. Forcing it burns and can throw the blade.
Mistake 6 — Fine blade in thick timber
The fix: coarse, deep-gulleted blade. Fine teeth clog and burn in deep cuts.
Mistake 7 — Backing out of a curve while running
The fix: switch off and wait, or cut out through the waste.
Mistake 8 — Forcing the feed
The fix: steady and patient. Pushing bows the blade and ruins accuracy.
Mistake 9 — Cutting round stock loose on the table
The fix: a V-block jig. Loose round stock rolls and spins.
Mistake 10 — Leaving the blade tensioned for months
The fix: release it at the end of a session — and check it before the next.
Pro Tips Worth Knowing
- Fit a zero-clearance table insert. It supports the wood right at the blade and stops small offcuts dropping into the machine.
- Make a tall auxiliary fence for resawing. A plywood face that supports the full height of the board makes resawing dramatically easier.
- Keep a spare blade of each type, coiled and labelled. Blade changes are quick once you are used to them.
- Write the drift angle on a card and store it with each blade. Saves repeating the test every time you refit it.
- Wax the table. Feed pressure drops noticeably and control improves.
- Clean the wheel tyres. Built-up pitch and sawdust cause tracking problems that look like faults.
- A band saw plus a spindle sander is a fantastic pair — cut to the waste side, then sand to the line.
- Blade breakage at the weld is normal eventually. Blades are consumable; a blade that snaps after a lot of use has not failed prematurely.
- Do not force a resaw to save a pass. Two lighter passes from opposite faces beat one strained cut.
- Check the table is square regularly. It gets knocked, and every cut afterwards inherits the error.
What I Recommend
Nothing changes a band saw’s behaviour more than the blade. A good-quality blade in a modest saw out-performs a cheap blade in an expensive one — it stays sharp, tracks predictably and takes tension without distorting.
Timber Wolf Bandsaw Blade, 1/4″ × 93-1/2″, 6 TPI
🏆 Best All-Round BladeAn alloy steel blade in the most useful size for a 14-inch band saw — 1/4 inch wide at 6 TPI. That combination cuts curves tight enough for most furniture work while still handling general straight cutting and moderate thickness, which is why it is the blade to leave on the machine by default.
- ✅ 1/4 inch width — the sweet spot for curves without giving up straight-cutting ability
- ✅ 6 TPI clears waste well in reasonable thickness instead of clogging and burning
- ✅ Fits standard 14-inch band saws, the most common size in home workshops
- ✅ Takes proper tension without distorting, which is what straight cuts depend on
- ✅ A quality blade transforms a budget saw more than any other upgrade
Prices and availability change often — check Amazon for the current price. Check your saw’s required blade length before ordering; it varies by model.
Frequently Asked Questions
Why does my band saw not cut parallel to the fence?
That is drift, and it is normal. Slight variations in tooth set and the blade weld mean most blades naturally cut at a small angle to the machine’s fore-and-aft line, and the angle is specific to each blade. Find it by cutting freehand along a drawn line on scrap, stopping mid-cut, and pencilling the board’s edge position on the table. Set the fence parallel to that line — or use a point fence, which accommodates drift automatically.
What blade width should I use for curves?
Narrower blades turn tighter curves. A 1/8 inch blade handles very tight scrollwork, 1/4 inch covers most furniture curves, and 1/2 inch and above are essentially straight-cutting blades. Forcing a wide blade around a tight curve twists it in the cut, burns the back edge, and can pull the blade off the wheels. If the curve is too tight for your blade, fit a narrower one or use relief cuts.
Does a band saw kick back like a table saw?
No, and that is its biggest safety advantage. The blade travels downward through the cut, pressing the workpiece onto the table rather than lifting it, so there is no rising edge to catch the wood and throw it. That makes a band saw the right choice for small parts, odd shapes and round stock. Your fingers are still the risk though — keep hands out of the blade’s line and use a push stick.
Why is my resaw cut bowed or barrelled?
Usually not enough blade tension, though feeding too fast and using too fine a blade both contribute. Under-tensioned blades bow away from the cut under load, producing a curved face. Tension to the scale for the blade width and check by deflection, fit the widest low-TPI blade your saw takes, set the guard just above the board, and feed slowly. A tall auxiliary fence also helps a great deal.
How do I cut a curve that is tighter than my blade allows?
Use relief cuts. Make a series of straight cuts from the edge of the board in toward the waste side of your curve line, spaced along it. When you then cut the curve, the waste falls away in small sections instead of binding against the back of the blade. It is the most useful curve-cutting technique there is and turns impossible curves into straightforward ones.
Should I release the blade tension when not using the saw?
Yes, if the saw will sit for a while. Leaving a blade fully tensioned for long periods stresses the wheel bearings and can leave a permanent set in the rubber tyres. Use the quick-release lever if your saw has one. The important companion habit is checking tension before every session — a saw left slack and forgotten cuts very badly, and people usually blame the blade.
Your Final Checklist
- Blade width chosen for the tightest curve you need
- TPI matched to thickness — coarser for thicker
- Tension set to the scale and checked by deflection
- Tracking centred, checked unplugged by hand
- Both sets of guides set just behind the gullets
- Thrust bearings just clear of the blade at rest
- Table square to the blade
- Guard set about 6mm above the work
- Drift found and the fence set to it, or use a point fence
- Relief cuts planned for tight curves
- V-block for round stock
- Steady feed — never force it
- Hands out of the blade line, push stick at the end
- Never back out of a curve with the saw running
- Release tension when you finish for the day
Next in this series: using an oscillating spindle sander and using a thickness planer.