A whole floor, one room, or a patch by the door all need different tools. Here is how to work out which one you actually need.
⚡ The Short Answer
Whole floor, boards uneven or heavily worn → rent a drum sander plus an edger. Whole floor, flat but tired finish → rent an orbital floor sander, far safer for a first-timer. One room or less → rent the orbital, or use a handheld random orbital if you have patience. A patch or a doorway → handheld random orbital and a sheet sander for the corners.
Before any of that, check what your floor is. Solid wood can be sanded several times over its life. Engineered wood may have only a millimetre or two of real wood on top. Parquet needs different technique entirely.
“What sander do I need for a wood floor?” is a question with four legitimate answers, and picking the wrong one either wastes a weekend or damages the floor permanently.
The two variables that decide it are how much floor and what condition it is in. A tired but flat floor needs almost nothing aggressive. A cupped, paint-splattered floor with fifty years of wear needs a machine that levels. Using the levelling machine on the tired floor is how people gouge boards.
This guide walks through the decision, then covers the tools for each scenario.
Check Your Floor Type First
Five minutes here can save a floor. Lift a threshold strip, look at a cut edge in a cupboard, or check where the floor meets a vent.
| Floor type | How to spot it | Can it be sanded? |
|---|---|---|
| Solid hardwood | Same grain through the full board thickness | ✅ Yes, several times over its life |
| Engineered wood | Thin real-wood layer over plywood or HDF, visible as layers at the edge | ⚠️ Sometimes once, lightly — check wear layer |
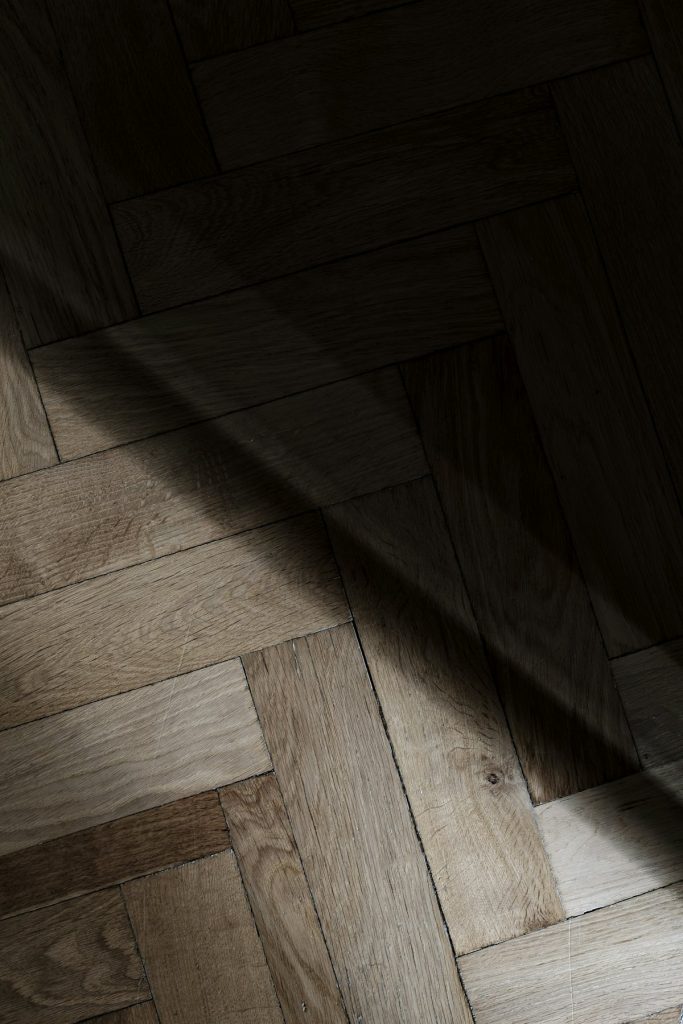
| Parquet / herringbone | Small blocks in a pattern, grain runs multiple ways | ⚠️ Yes, but needs specific technique |
| Laminate | Printed photographic layer, repeating grain pattern | ❌ No — sanding destroys it |
| Bamboo | Strand or strip appearance | ⚠️ Depends on construction — check with the manufacturer |
Laminate cannot be sanded at all — the “wood” is a printed image under a wear coating. Sanding goes straight through to a grey substrate.
Engineered floors are the risky one because they look identical to solid wood from above. The wear layer can be anywhere from a generous 4–6mm down to under 1mm. A drum sander removes more than that in a single pass. If you cannot confirm the thickness, do not use an aggressive machine.
⚠️ Count the sandings. Even solid wood is finite. Each full sand removes material, and once the boards get close to the tongue or the nail heads, that floor’s sanding life is over. If your floor has clearly been sanded several times before, a light screen is safer than a full sand.
The Decision Tree
- Is it laminate? Stop. It cannot be sanded. Replace or overlay.
- Is it engineered with a thin wear layer? Either screen and recoat, or get a professional opinion. Do not use a drum sander.
- Are the boards flat, with the damage limited to the finish? Rent an orbital floor sander, or screen and recoat. No drum sander needed.
- Are the boards cupped, uneven, painted or badly worn? This is the one genuine case for a drum sander plus edger — or a professional.
- Is it a small area, one room or less? An orbital rental, or a handheld random orbital and a lot of patience.
- Is it a patch, a doorway or a repair? Handheld random orbital plus a sheet sander for corners. No rental needed.
The pattern is simple: the aggressive machine is only for genuinely uneven floors. Most floors people want to refinish are flat and just look tired, and for those the gentle route gives an excellent result with far less risk.
The Four Options Compared
| Option | Source | Removal | Risk | Best for |
|---|---|---|---|---|
| Drum floor sander | Hire shop | Very high | ❌ High — gouges easily | Cupped, painted or badly worn floors |
| Orbital floor sander | Hire shop | Moderate | ✅ Low | Flat floors needing refinishing |
| Edger | Hire shop | High | ⚠️ Medium | Perimeter, within inches of walls |
| Handheld random orbital | Buy | Low | ✅ Very low | Patches, doorways, small rooms, blending |
The orbital floor sander is the underrated option. Hire shops rent them alongside drum sanders, they are far more forgiving, and for a floor that is flat but has a worn finish they do an excellent job. A first-time user is very unlikely to damage a floor with one, which cannot be said for a drum sander.
The edger is not optional if you rent either floor machine. Neither reaches within a few inches of the walls. Skipping it leaves an obvious untouched border.
When a Handheld Sander Is Enough
People underestimate this. A handheld random orbital will absolutely sand a wood floor — it is just slow. That makes it viable for:
- A patch repair where a few boards have been replaced or damaged
- A doorway or threshold area
- A small room — a bathroom, a hallway, a box room — if you have the patience
- Blending the edger line after a rental job, which is genuinely the best use for one on a big floor
- Stairs, where floor machines cannot go at all
- Under radiators and around pipes, using a sheet sander for the square corners
For a whole floor it is unrealistic — you would be on your knees for days and the result would likely be uneven. But for anything up to a small room, it avoids a rental entirely and the tool stays useful afterwards.
✅ Kneeling matters more than you think. Floor work with a handheld sander is done on your knees for hours. Knee pads are not an optional comfort item — they are what determines whether you finish the job in one session.
Tools Worth Owning
The floor machines are rentals. These are the handheld tools that earn their place in a cupboard afterwards.
DEWALT Random Orbit Sander, Variable Speed, 5-Inch (DWE6423)
Best for Floor Patches & Blending★★★★★ 4.7 out of 5 — the practical floor helper
The tool that handles everything the rental machines cannot reach. Variable speed from 8,000 to 12,000 OPM lets you run slower where you are blending into an already-sanded area, and the random orbit action leaves no swirl marks — which matters enormously on a floor that will be stained or oiled.
- ✅ Blends the edger line where the perimeter meets the main floor
- ✅ Handles patches, thresholds and stairs that no floor machine reaches
- ✅ No swirl marks before stain or oil
- ✅ Stays useful for furniture and general work afterwards
- ⚠️ Far too slow for a whole floor
- ⚠️ Best for: repairs, small rooms, blending, stairs
Price and availability change often — the button shows the live Amazon price.
DEWALT Electric Sander, 1/4 Sheet, 14,000 OPM (DWE6411)
Best for Corners & Edges★★★★★ 4.8 out of 5 — reaches what round pads cannot
Floors are full of internal corners — where the boards meet the skirting, around door frames, in alcoves, behind radiator pipes. A round pad cannot enter a square corner. The quarter-sheet square pad can, at 14,000 OPM, and it is cheap to feed because you cut your own sheets.
- ✅ Square corners where boards meet skirting and door frames
- ✅ Very cheap to run — cut sheets from full sheets
- ✅ Light for extended work at floor level
- ⚠️ Slow over open floor area — this is a corner tool
- ⚠️ Best for: corners, alcoves, around pipes and frames
Price and availability change often — the button shows the live Amazon price.
| Tool | Role on a floor job |
|---|---|
| DEWALT DWE6423 | Patches, blending, stairs, small rooms |
| DEWALT DWE6411 | Corners, alcoves, around pipes |
| Makita BO5030K | Simple single-speed alternative for patches |
| 8″ x 19″ drum belts | Abrasive for a rented drum sander |
💬 Affiliate disclosure: as an Amazon Associate, DetailSanderGuide may earn from qualifying purchases. This costs you nothing extra and never changes which tools we recommend.
Grit Sequence
| Grit | Stage | Use it when |
|---|---|---|
| 36–40 | Heavy levelling | Only for cupped boards, paint or severe wear |
| 60 | Removing coarse scratches | Always follows a 36–40 pass |
| 80 | General sanding | The realistic starting grit for most floors |
| 100–120 | Final pass before finish | Where nearly every floor should end |
Start with the finest grit that will do the job. Test a small area at 80. If it takes the finish off at a reasonable rate, stay there — you will remove far less wood and the floor will thank you in twenty years when someone sands it again.
Do not finish finer than 120. Floors need a slight key for the finish to grip, and over-sanding closes the grain so stain sits unevenly. Our grit progression planner maps the sequence for your wood and finish.
Screening — The Option People Miss
If your floor’s finish is worn but the wood underneath is sound, you may not need to sand at all. Screening — also called a screen and recoat, or buffing — abrades just the top of the existing finish so a fresh coat can bond to it.
Why it is worth considering:
- It removes almost no wood, so it does not use up the floor’s limited sanding life
- It is far faster — a room can be screened and recoated in a day
- Much less dust than a full sand
- Lower risk — there is very little you can do wrong
- Cheaper in both rental and abrasive
When screening will not work: if the finish has worn completely through to bare wood in traffic areas, if there are deep scratches or stains in the wood itself, if the boards are cupped, or if the existing finish is flaking. In those cases you need a full sand.
A useful test: put a drop of water on a worn area. If it beads, there is still finish there and screening should work. If it soaks straight in, the wood is bare and a recoat over it will show a colour difference.
Common Mistakes and Fixes
1. Renting a drum sander for a flat floor
Result: unnecessary risk of gouging, and more wood removed than needed.
Fix: orbital sander or screening for floors that are flat but tired.
2. Sanding engineered flooring aggressively
Result: straight through the wear layer to plywood.
Fix: check the board edge first; screen and recoat instead.
3. Forgetting the edger
Result: a visible untouched border around the whole room.
Fix: rent the edger with the machine and run it through the same grits.
4. Sanding across the boards
Result: cross-grain scratches that stain highlights dramatically.
Fix: always work along the length of the boards.
5. Not punching nails
Result: torn abrasive and a damaged rental machine.
Fix: go over the entire floor with a nail punch before starting.
6. Trying to do a whole floor with a handheld sander
Result: days of kneeling and an uneven result.
Fix: rent for anything larger than a small room.
7. Skipping the dust clean before finishing
Result: grit trapped in the finish, permanently.
Fix: vacuum, allow settling time, vacuum again, then tack cloth.
Cost and Time Planning
The two things people underestimate are how long edging takes and how much abrasive a floor eats. Planning both prevents the classic failure of a half-finished floor and a rental due back.
Time. For a first-timer, a single average room is realistically a full weekend once you include preparation, the grit passes, edging, corner work and cleaning. Preparation alone — clearing the room, punching nails, pulling gripper rods and staples, sweeping — often takes a few hours before the machine is even switched on. Edging frequently takes as long as the entire main floor, because it is slow, awkward work done on your knees around the whole perimeter.
Abrasive. Buy considerably more than you think you need, across the full grit range. Belts and discs wear faster on old finishes, and running out of one grit halfway through leaves you with a choice between stopping or skipping a step — and skipping a step shows in the finished floor. Most suppliers will take back unopened packs.
Rental duration. Booking the machine for an extra day costs far less than booking it twice, and it removes the time pressure that causes rushed passes and gouges. If the hire shop offers a weekend rate, take it.
Finish. Factor in drying and curing times after sanding. A floor that has been sanded beautifully and then walked on before the finish cured is a frustrating way to end the project.
Preparing the Room
- Clear everything, including curtains and wall hangings. Floor sanding dust gets into fabric and stays there.
- Punch every nail below the surface. A single proud nail tears abrasive instantly and can damage a rented drum.
- Remove carpet gripper, staples and tacks completely — these are the other abrasive killers.
- Take doors off if they open into the room, and remove any floor vents.
- Seal the doorway with plastic sheeting and cover heating vents. Floor dust travels through an entire house.
- Check for loose or squeaking boards and fix them first — sanding will not cure movement, and a loose board sands unevenly.
- Sweep and vacuum thoroughly so grit does not get dragged under the machine.
Stairs and Awkward Areas
Every floor job has areas no machine reaches, and stairs are the hardest of them.
Stairs cannot be done with a floor machine at all. Treads, risers, nosings and the awkward junction where a tread meets a string are all handwork or handheld-sander work. A random orbital handles the flat tread surfaces, a sheet sander deals with the square internal corners, and a scraper plus hand sanding covers the nosings and mouldings. Budget considerably more time per square metre than for open floor — stairs are slow.
Under radiators is another common problem area. If the radiator cannot be removed, a sheet sander on its side or a hand block wrapped in paper is usually the only option. Some people accept a slightly less-sanded strip here on the basis that it is permanently in shadow.
Around pipes and vents needs hand sanding or a detail sander. Take the time — a ring of old finish around a pipe is very visible once the rest of the floor is fresh.
Thresholds and doorways often have a change of level or a metal strip. Remove strips before sanding where you can, and be careful not to catch the machine on any lip.
Frequently Asked Questions
What sander is best for wood floors?
It depends on the floor’s condition. For cupped, painted or badly worn boards, a rented drum sander plus edger is the only thing that will level them. For flat floors with a tired finish — which is most floors people want to refinish — a rented orbital floor sander is safer and does an excellent job. For patches, doorways, stairs and small rooms, a handheld random orbital is enough and you keep the tool afterwards.
Can I sand a wood floor with a regular orbital sander?
Yes, but only realistically for small areas. A handheld random orbital will sand a floor perfectly well — it is simply slow, and you will be on your knees. It is genuinely the right tool for a patch repair, a threshold, a small room, stairs, or blending the line the edger leaves. For a whole floor it is impractical and the result tends to be uneven.
How many times can a wood floor be sanded?
Solid hardwood can usually take several full sandings across its life, depending on board thickness and how much is removed each time. The limit is reached when the boards get close to the tongue or the nail fixings. Engineered floors are far more limited — sometimes one light sand, sometimes none, depending on the wear layer thickness. If a floor has visibly been sanded several times already, screening and recoating is the safer option.
What is screening a floor?
Screening — or a screen and recoat — uses an abrasive screen on a buffer to lightly abrade the existing finish so a new coat bonds to it. It removes almost no wood, produces far less dust, and takes a fraction of the time of a full sand. It works when the finish is worn but intact. It will not work if the finish has worn through to bare wood, if there are deep scratches, or if the boards are cupped.
Do I need an edger as well?
Yes, if you are renting a floor machine. Neither a drum nor an orbital floor sander can reach within a few inches of the walls, so without an edger you get a clearly visible untouched border around the entire room. Run the edger through the same grit sequence as the main machine, or the perimeter will take stain differently and show as a frame around the floor.
Checklist
- Floor type identified — solid, engineered, parquet or laminate
- Wear layer checked if engineered
- Condition assessed — flat and tired, or genuinely uneven
- Screening considered before committing to a full sand
- Correct machine chosen — orbital unless levelling is needed
- Edger rented alongside any floor machine
- All nails punched below the surface
- Handheld sander ready for corners, stairs and blending
- Grit sequence planned, starting with the finest that works
- Working along the boards, never across
- Respirator, eye and hearing protection on
- Vacuumed, settled and tack-clothed before finishing
Final Thoughts
Most people reaching for a drum sander do not need one. If your boards are flat and the problem is a tired finish, an orbital rental or a screen and recoat gives a beautiful result with almost none of the risk — and leaves more wood on the floor for the next time.
Save the drum sander for floors that genuinely need levelling, and keep a handheld random orbital for everything the big machines cannot reach.
🔧 What to read next: see drum floor sanders for the rental machine in detail, and hardwood floor refinishing for the full process. Plan grits with the grit progression planner.