How to apply oil finishes — Danish, tung, linseed and hardwax oils compared, the wipe-on wipe-off method, and the rag fire risk nobody should ignore.
Oil finishes look like nothing else. They deepen the colour, make the grain glow, and leave a surface that feels like wood rather than plastic. Run your hand over an oiled tabletop and you can feel the timber, not a coating.
They are also the most repairable finish there is. Scratch a varnished table and you have a scratch in a plastic film that you cannot blend out. Scratch an oiled one and you can usually sand the spot and re-oil it, and it disappears.
The trade-off is protection. Oil soaks in and hardens inside the wood rather than forming a barrier on top, so it resists water and spills far less well than a film finish.
And before anything else, there is one genuine hazard. Rags soaked in oil finish can catch fire on their own. Not as a freak accident — as ordinary chemistry, in ordinary workshops, regularly. It is covered properly below, and it is the part of this guide worth reading even if you skip the rest. 💡
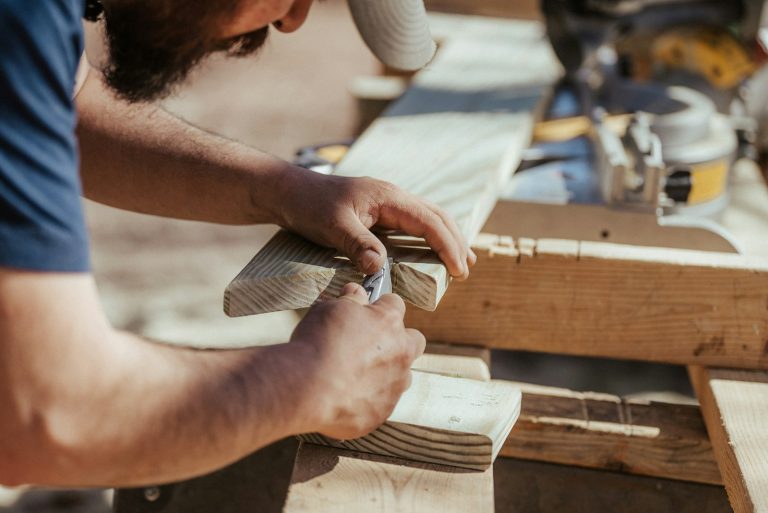
Alt text: “Cloth applying Danish oil to a walnut surface, with the grain deepening in colour where oiled”
- The rag fire risk — read this first
- Oil versus film finishes
- Which oil is which
- What Danish oil actually is
- Preparing the surface
- Step by step
- Wiping off — the step that decides everything
- How many coats and when to stop
- Wet-sanding for a glass-smooth finish
- Food-safe surfaces
- Outdoors, and the maintenance reality
- Common mistakes (and how to fix them)
- Pro tips worth knowing
- What I recommend
- Frequently asked questions
- Your final checklist
The Rag Fire Risk — Read This First
What to do with used rags — pick one and do it every time:
- Lay them out flat outdoors, hung over a line or spread on concrete, until they are completely dry and stiff. Once fully cured they are safe.
- Or submerge them in water in a sealed metal container.
- Or seal them in a metal container with a tight lid, which starves the reaction of oxygen.
What never to do: screw them into a ball, drop them in a bin, leave them in a pile on the bench, stuff them in a pocket, or put them in a plastic bag in a warm room.
This applies to more than oil. Oil-based stains, Danish oil, tung oil, linseed oil, teak oil and many oil-based varnishes all cure this way. Even a rag that feels barely damp is enough.
The safest habit is the simplest one: the moment a rag leaves your hand, it goes flat on the ground outside. Not on the bench “for a minute.” Make it automatic and the risk disappears entirely.
Oil Versus Film Finishes
| Oil finish | Film finish (varnish, poly) | |
|---|---|---|
| Where it sits | ✅ Inside the wood | On the surface |
| Feel | ✅ Natural, tactile | Smooth, can look plastic |
| Water resistance | ⚠️ Limited | ✅ Much better |
| Scratch resistance | ⚠️ Lower | ✅ Higher |
| Repairability | ✅ Excellent — spot repair | ⚠️ Poor — usually needs redoing |
| Application difficulty | ✅ Very easy | Moderate — brush marks, dust |
| Dust nibs | ✅ Almost none | ⚠️ A constant battle |
| Maintenance | ⚠️ Re-oil periodically | ✅ Little until it fails |
Choose oil when you want the wood to look and feel natural, the piece will not get heavy water exposure, and you are happy to top it up occasionally. Excellent for furniture, boxes, turned work, shelving and anything with carving or texture where a brush would pool.
Choose a film finish when the surface takes real punishment — kitchen worktops, dining tables with children, bathroom furniture, floors. Our guide on applying polyurethane covers that route.
The repairability point is genuinely underrated. An oiled piece that gets scratched or ring-marked can usually be fixed in twenty minutes with abrasive and a wipe of oil, blending invisibly. The same damage on polyurethane means stripping and recoating the whole surface.
Which Oil Is Which
| Finish | What it is | Best for | Notes |
|---|---|---|---|
| Boiled linseed oil | Treated linseed with driers | Traditional work, tool handles | ⚠️ Ambers heavily over time |
| Pure tung oil | Nut oil, cures hard | ✅ Water resistance, natural look | ⚠️ Very slow to cure |
| Danish oil | ✅ Oil + varnish + solvent blend | ✅ The practical all-rounder | Formula varies by brand |
| Teak oil | Blend, despite the name | Dense hardwoods | ⚠️ Not from teak; varies widely |
| Hardwax oil | Oil + wax blend | ✅ Floors, worktops | ✅ More protection than pure oil |
| Mineral oil | Non-drying petroleum oil | ✅ Chopping boards | ⚠️ Never cures — wipes off |
Hardwax oil deserves attention. It combines penetrating oil with waxes that build a thin protective layer at the surface, so you get much of the oil look and repairability with noticeably better water and wear resistance. It is why hardwax oils dominate wood flooring and worktops now.
Mineral oil is different from all the others. It does not cure at all — it stays liquid in the wood. That is exactly what you want for a chopping board that gets washed and re-oiled constantly, and exactly what you do not want for furniture, where it would stay slightly greasy forever.
What Danish Oil Actually Is
Worth clearing up, because it causes real confusion.
Danish oil is not a specific oil. It is a category of blend — typically a drying oil, some varnish or resin, and a solvent thinner. There is no standard recipe, no governing definition, and no requirement for any two brands to be similar.
Why it matters:
- Different brands behave differently. Drying times, sheen and build vary noticeably.
- Do not assume you can swap brands mid-project. Finish a piece with what you started with.
- It is a hybrid, and that is its strength. The oil penetrates and gives the natural look; the varnish component adds more protection and faster curing than pure oil alone.
- “Teak oil” is the same story. It contains no teak and is another unregulated blend.
For most furniture, a Danish oil is the sensible default. Easier and faster than pure tung oil, more protective than straight linseed, and far more forgiving than a brushed film finish.
Preparing the Surface
Oil penetrates, so it shows the wood exactly as it is. Preparation matters as much as with any finish — but the grit rules are slightly different.
- You can sand finer than for stain. Because oil soaks in rather than relying on open pores for colour, sanding to a finer grit is fine and gives a smoother result. Many people finish at 220, and going further is reasonable for a very smooth feel.
- Sand consistently and with the grain. Any cross-grain scratch will darken when oiled and stand out.
- Remove every trace of dust. Vacuum, then wipe.
- Check for glue. Dried adhesive blocks oil the same way it blocks stain, leaving pale patches. See gluing and clamping wood.
- Oil deepens colour dramatically. Wipe the bare wood with a damp cloth or a little white spirit to preview roughly how it will look — this “pops” the grain the way oil will.
- Test on an offcut from the same board.
Our guide on sanding furniture covers working through the grits properly.
Step By Step
Step 1 — Sort your rag disposal before you start
Decide where used rags go — a spot outdoors, or a metal container with water. Set it up now, not later.
Step 2 — Prepare and dust off
Step 3 — Ventilate
Most oil finishes contain solvents. Open windows and doors.
Step 4 — Stir, do not shake
Same as any finish — shaking introduces bubbles.
Step 5 — Apply generously
Flood the surface with a cloth, brush or pad. Be liberal on the first coat — the wood is thirsty and you want it to drink.
Step 6 — Let it soak in
Typically somewhere around fifteen to thirty minutes, but check the tin — it varies by product.
Step 7 — Re-wet dry patches
End grain and porous areas absorb faster and go dull. Add more oil to those spots during the soak so the whole surface stays wet.
Step 8 — Wipe off all the excess
Thoroughly. This is the critical step — see below.
Step 9 — Deal with the rags immediately
Flat outdoors, or into water in metal.
Step 10 — Let it cure
Per the tin, and longer in cold or humid conditions.
Step 11 — Light abrasive between coats, then repeat
A very light pass with fine abrasive knocks back any raised grain. Then coat again.
Step 12 — Check for weeping
An hour or two after wiping, check for oil seeping back out of pores or end grain, and wipe it away.
Wiping Off — The Step That Decides Everything
Exactly the same principle as staining, and exactly the same failure.
Only the oil that soaks into the wood does anything useful. Anything left sitting on the surface has no film-forming binder to cure properly. It goes tacky, then gummy, and it can stay that way indefinitely — leaving a sticky, patchy surface that attracts dust.
How to wipe properly:
- Use clean lint-free cloths and swap them as they load up.
- Wipe along the grain, firmly, across the whole surface.
- Follow with a second dry cloth to catch what the first missed.
- Check corners, mouldings and carvings where oil pools.
- Come back after an hour — porous timber and end grain often weep oil back out, and that weeping will cure into shiny sticky spots if left.
How Many Coats and When to Stop
| Use | Coats | Notes |
|---|---|---|
| Decorative items, boxes | 2 | Light use |
| General furniture | ✅ 3 | The usual answer |
| Tabletops and desks | ✅ 4–5 | More build, more protection |
| Worktops | 5+ or hardwax oil | ⚠️ Consider a hardwax oil instead |
| Tool handles | 2–3 | Grip matters more than sheen |
| Chopping boards | Until saturated | Mineral oil, repeated |
How to tell when to stop: apply a coat and watch. If the wood drinks it in quickly, it still wants more. When the oil sits on the surface without soaking in after a few minutes, the wood is saturated and further coats will only add surface residue that you then have to wipe off.
Each coat gives slightly more sheen and slightly more protection, but the gains taper off. Three good coats on furniture is a genuinely durable, attractive finish.
Wet-Sanding for a Glass-Smooth Finish
A lovely technique that produces a surface far smoother than oil alone, especially on open-grained timber like oak or ash.
- Apply a generous coat of oil to the surface.
- While it is still wet, sand it with fine wet-and-dry abrasive — around 400 grit or finer — working with the grain.
- A slurry forms of oil mixed with very fine wood dust.
- Work that slurry across the surface. It packs into the open pores of the grain.
- Wipe off the excess thoroughly, along the grain.
- Let it cure, then repeat for further coats if you want more fill.
Why it works: the wood dust in the slurry is the same colour as the wood, so it fills the pores invisibly. You end up with a very smooth, level surface that still looks and feels like oiled timber rather than a coating.
Food-Safe Surfaces
Worth handling carefully, because there is a lot of confident misinformation about it.
The generally accepted position among finishing authorities is that fully cured film finishes are inert and pose no meaningful risk for incidental food contact. Curing is the important word — a finish that has not fully cured is a different matter.
But for chopping boards and food-prep surfaces specifically, the practical answer is different, and not really about toxicity:
- Cutting boards get cut. Any hardened finish gets sliced into and flakes off into food.
- They get washed constantly, which strips finishes.
- They need re-treating often, so you want something you can simply wipe on again.
That is why food-grade mineral oil, often with beeswax, is the standard for boards. It never cures, so it cannot flake; it is easily topped up; and it is sold explicitly for the purpose.
For a butcher block worktop, see our guide on sanding a butcher block countertop.
Outdoors, and the Maintenance Reality
Oil finishes outdoors need honest expectations.
Oil offers limited UV protection and limited water resistance. On exterior timber it does not fail dramatically like a peeling varnish — it just gradually wears away, and the wood underneath greys and weathers. That means frequent reapplication, often annually or more, depending on exposure.
Two specific warnings:
- Oil on wood that stays damp can encourage mildew. On fully exposed outdoor furniture that never really dries out, an oil finish can feed surface mould growth. A proper exterior sealer or a spirit-based exterior finish is often the better choice for furniture that lives outside permanently.
- Sheltered is very different from exposed. Oiled furniture on a covered porch behaves completely differently from the same piece standing in the rain.
See our guides on outdoor teak furniture and decking for the exterior side.
Indoor maintenance
The good news. An oiled indoor piece is easy to keep: clean it, abrade any marks lightly, wipe on a fresh coat, wipe off the excess. No stripping, no sanding back, no visible repair line. Doing this once a year on a well-used tabletop keeps it looking excellent indefinitely.
Common Mistakes (And How to Fix Them)
Mistake 1 — Balling up oily rags
The fix: flat outdoors, or in water in a metal container. This is a genuine fire risk, not a theoretical one.
Mistake 2 — Leaving excess oil on the surface
The fix: wipe until the cloth comes away nearly clean, then again with a dry one. Excess goes sticky and never hardens.
Mistake 3 — Not checking for weeping
The fix: come back after an hour and wipe any oil that has seeped back out.
Mistake 4 — Expecting oil to protect like varnish
The fix: match the finish to the use. Kitchens and bathrooms want a film finish or hardwax oil.
Mistake 5 — Switching brands mid-project
The fix: Danish and teak oils are unregulated blends that vary. Finish with what you started with.
Mistake 6 — Cooking oil on chopping boards
The fix: food-grade mineral oil. Kitchen oils go rancid.
Mistake 7 — Recoating before the previous coat has cured
The fix: respect the stated time, longer in cold or damp.
Mistake 8 — Ignoring thirsty end grain
The fix: re-wet dry patches during the soak so the surface stays evenly wet.
Mistake 9 — Oiling exposed outdoor furniture and expecting it to last
The fix: use an exterior sealer for permanently exposed pieces, or accept frequent reapplication.
Mistake 10 — Poor ventilation
The fix: open up. Most oil finishes carry solvents.
Pro Tips Worth Knowing
- Preview the colour with a damp cloth on bare wood. It shows roughly what the oil will do, before you commit.
- Oil is the best finish for carved and textured work. It cannot pool, run or leave brush marks in detail the way varnish does.
- Finish the undersides too. Sealing only one face of a panel lets moisture move unevenly and encourages warping.
- Apply with a cloth, not a brush for most work — better control and no brush to clean.
- Warm the oil slightly in cold weather by standing the tin in warm water. It penetrates better. Never heat it directly.
- Buff the final coat with a clean dry cloth once it is nearly dry for a lovely soft sheen.
- Wear nitrile gloves. Oil finishes are hard to get off skin and transfer onto everything.
- Keep a small labelled bottle of the oil you used with each piece, for future touch-ups.
- Add a wax topcoat for extra sheen and light water resistance once the oil has fully cured.
- Oil over existing oil is easy; oil over varnish does not work. It cannot penetrate a sealed surface, so strip first.
What I Recommend
For most furniture, a Danish oil is the practical choice — easier than pure tung oil, more protective than plain linseed, and forgiving enough that a first attempt looks good.
Watco Danish Oil Wood Finish, Natural, Quart
🏆 Best All-Round OilA low-VOC Danish oil in a quart tin — the long-established blend of penetrating oil and varnish that gives the natural oiled look with more durability than a pure oil. The natural shade adds warmth and depth to the grain without changing the wood’s colour, which is what most people actually want.
- ✅ Penetrates and hardens in the wood, so the surface still feels like timber
- ✅ Varnish content adds real durability compared with plain linseed or tung oil
- ✅ Wipe-on, wipe-off application — no brush marks, no dust nibs, very hard to get wrong
- ✅ Spot-repairable, unlike a film finish, so scratches blend away
- ✅ Quart size suits a piece or two without a gallon sitting half-used
Prices and availability change often — check Amazon for the current price. Dispose of oil-soaked rags flat outdoors or in water in a sealed metal container.
Frequently Asked Questions
Can oily rags really catch fire on their own?
Yes, and it happens regularly enough that it is a well-documented fire cause. Drying oils cure by reacting with oxygen and that reaction gives off heat. Spread thin on wood the heat disperses, but bunched in a pile or a bin it is trapped, the reaction speeds up, and the rag can reach ignition temperature hours later. Lay used rags flat outdoors until stiff, or seal them in water in a metal container.
What actually is Danish oil?
It is a category rather than a specific oil — typically a blend of drying oil, varnish or resin, and solvent. There is no standard recipe, so different brands genuinely behave differently in drying time, sheen and build. That hybrid nature is its strength: the oil penetrates for a natural look while the varnish component adds protection and speeds curing compared with pure oil. Do not swap brands part-way through a project.
Why is my oiled surface sticky?
Because excess oil was left sitting on the surface. Only the oil that soaks into the wood cures properly; what remains on top has no binder to harden and turns tacky, sometimes indefinitely. Wipe a cloth dampened with the appropriate solvent over the surface to redissolve the gummy layer, wipe it dry, then reapply and wipe off thoroughly. Check again an hour later for oil weeping back out of the pores.
How many coats of oil do I need?
Three is the usual answer for general furniture, four or five for tabletops and desks. The practical test is to watch how the wood responds — if it drinks the oil in quickly it still wants more, and when the oil sits on the surface without soaking in the wood is saturated. Further coats then only add residue you have to wipe off, so that is the point to stop.
Is an oil finish food safe?
Finishing authorities generally accept that fully cured film finishes are inert for incidental food contact, with curing being the key condition. But for chopping boards the practical answer is different: any hardened finish gets sliced into and flakes off, and boards get washed constantly. That is why food-grade mineral oil, often with beeswax, is standard — it never cures so it cannot flake, and it is easy to top up. Never use kitchen cooking oils, which go rancid.
Can I put oil over an existing varnish?
No. Oil finishes work by penetrating into the wood, and a varnish or polyurethane film seals the surface so there is nothing for the oil to soak into — it will simply sit on top and stay sticky. You would need to strip the existing finish back to bare wood first. Oil over previously oiled wood, on the other hand, is straightforward, which is why oiled pieces are so easy to maintain.
Your Final Checklist
- Set up rag disposal first — flat outdoors, or water in a metal container
- Choose the right oil for the use — hardwax for worktops, mineral for boards
- Sand consistently with the grain, up to 220 or finer
- Check for glue and remove all dust
- Preview the colour with a damp cloth
- Ventilate the space
- Stir, do not shake
- Apply generously and let it soak
- Re-wet thirsty patches during the soak
- Wipe off every trace of excess, then again with a dry cloth
- Deal with rags immediately
- Check for weeping an hour later
- Light abrasive between coats, then recoat
- Stop when the wood stops absorbing
- Finish undersides too, and plan to re-oil periodically
Next in this series: applying polyurethane and how to stain wood.