Compact circular saws are lighter, easier to control and enough for most DIY cutting. Here is where they shine and where they run out.
⚡ The Short Answer
A compact circular saw uses a smaller blade — typically 4-1/2″ to 6-1/2″ — instead of the traditional 7-1/4″. That makes it lighter, easier to control one-handed, and far less intimidating, at the cost of maximum cutting depth.
The number that matters is depth of cut at 90 degrees. A 6-1/2″ saw cuts comfortably through 2x material, which covers the vast majority of DIY work. Smaller mini saws may not.
Buy compact if you cut sheet goods, boards and 2x timber, and value control and weight. Buy a full-size 7-1/4″ if you regularly cut thick stock or bevel through 2x material.
Full-size circular saws are heavy, loud and genuinely intimidating the first time you use one. That intimidation causes hesitation, and hesitation causes bad cuts — which is why a lot of DIYers avoid the tool entirely and struggle on with a jigsaw.
Compact saws solve much of that. Less weight means better control, less fatigue and more confidence. For sheet goods, shelving, decking boards and general timber they do everything most people need.
Depth of Cut — The Spec That Matters
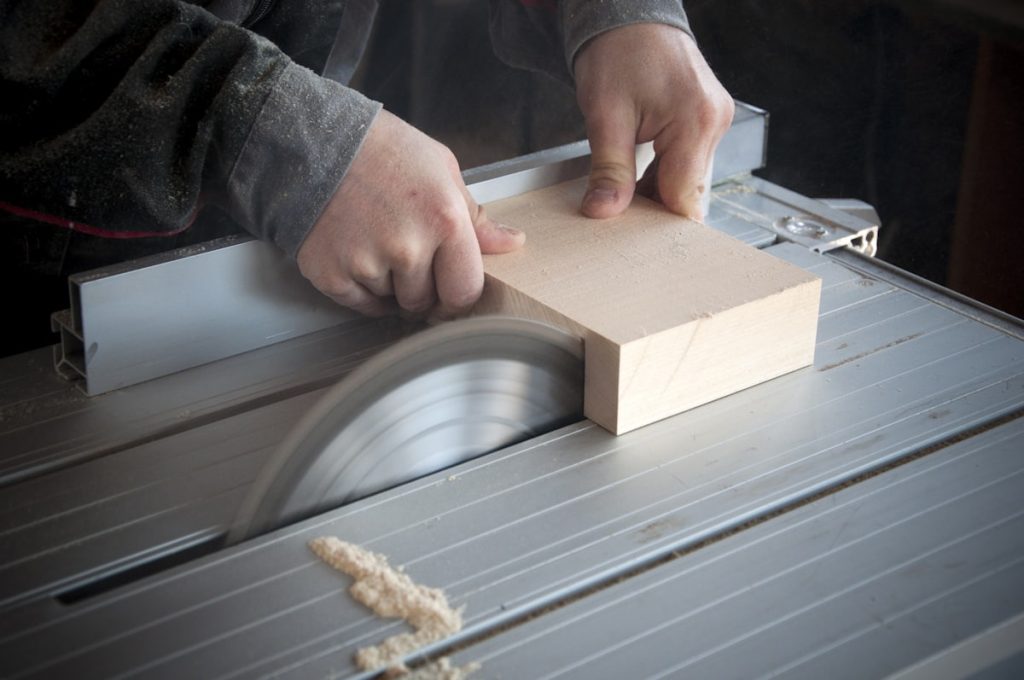
Blade diameter is what gets advertised, but depth of cut at 90 degrees is what determines whether the saw can actually do your job. It is always less than half the blade diameter, because the arbor and guard take up space.
The practical benchmark is 2x material — nominal two-inch timber, actually around 1-1/2 inches thick. Joists, studs, decking joists, fence rails. A saw that cannot get through 2x in one pass is significantly limited, because flipping the board and cutting from both sides rarely lines up perfectly.
Also check depth at 45 degrees. Bevel cuts reduce effective depth substantially. A saw that manages 2x at 90 degrees may not manage it at 45, which matters for roof work, trim and mitred frames.
Sheet goods are undemanding. Plywood, MDF and OSB are typically 1/2″ to 3/4″ thick, and almost any circular saw handles them. If sheet cutting is your main use, depth is not a constraint and a smaller saw is genuinely fine.
🪚 Check before you buy: can it cut through 2x material at 90 degrees in one pass? If yes, it will handle most DIY work. If no, you will hit that limit sooner than you expect.
Blade Sizes Compared
| Blade size | Cuts 2x? | Weight | Best for |
|---|---|---|---|
| 7-1/4 inch (full size) | ✅ Yes, plus bevels | Heaviest | Framing, thick stock, all-round |
| 6-1/2 inch (compact) | ✅ Yes at 90° | Noticeably lighter | Most DIY — the sweet spot |
| 5-1/2 inch | Usually just | Light | Sheet goods, trim, one-handed use |
| 4-1/2 inch (mini) | ❌ No | Very light | Sheet goods, laminate, tight spaces |
6-1/2 inch is the sweet spot for most people. It clears 2x material at 90 degrees, weighs meaningfully less than a full-size saw, and blades are widely available. It is the size most cordless saws use for exactly this reason.
Mini saws are genuinely useful but specialised. Excellent for breaking down sheet goods, cutting laminate flooring and working in confined spaces. They are not a substitute for a proper circular saw if you cut structural timber.
Other Specs Worth Checking
- Shoe material. A magnesium or cast shoe stays flat and resists knocks. Thin stamped steel can bend, and a bent shoe means you cannot cut straight no matter how careful you are.
- Blade speed (RPM). Higher speed generally gives cleaner cuts in wood, though blade quality matters more.
- Bevel range and stops. Most tilt to 45 degrees or beyond. Positive stops at common angles save setup time.
- Blade left or right. Blade-left saws give a right-handed user a clearer view of the cut line. It is largely preference, but worth thinking about.
- Electric brake. Stops the blade quickly when you release the trigger — a genuine safety feature.
- Dust port. Circular saws throw a lot of chips. A port that accepts a vacuum keeps the line visible.
- Corded or cordless. Cordless is far more convenient for occasional cuts around a house; corded gives sustained power for a day of ripping sheets.
Our Pick
DEWALT 20V MAX Circular Saw, Cordless Sidewinder
Best Cordless Compact★★★★★ 4.6 out of 5 — genuinely capable cordless cutting
A cordless sidewinder that delivers 5,150 RPM — enough blade speed for clean cuts in sheet goods and dimensional timber. The high-strength magnesium shoe is the detail worth paying attention to: it stays flat and survives being knocked about, which directly determines whether your cuts stay straight over the tool’s life.
- ✅ 5,150 RPM — clean cuts in ply, MDF and timber
- ✅ Magnesium shoe stays flat and survives site use
- ✅ Cordless — no cable to manage across a sheet of ply
- ✅ 20V MAX platform shares batteries with a wide tool range
- ⚠️ Check whether your listing includes a battery — many cordless saws are sold tool only
- ⚠️ Cutting sheets all day will work through batteries; corded suits sustained work
- ⚠️ Best for: DIY, sheet goods, decking, general timber cutting
Price and availability change often — the button shows the live Amazon price.
Comparison
| Tool | Type | Rating | Best for |
|---|---|---|---|
| DEWALT 20V MAX circular saw | Cordless sidewinder | 4.6 | General DIY cutting |
| DEWALT drill + impact combo | Same battery platform | 4.7 | Sharing batteries across tools |
| DEWALT XR hammer drill | Same battery platform | 4.6 | Masonry fixing |
💬 Affiliate disclosure: as an Amazon Associate, DetailSanderGuide may earn from qualifying purchases. This costs you nothing extra and never changes which tools we recommend.
Blades Matter More Than the Saw
This is the part people skip, and it makes more difference to cut quality than which saw you bought.
| Blade | Teeth | Use for |
|---|---|---|
| Framing / ripping | ~24 | Fast cuts along the grain, rough work |
| General purpose | ~40 | The everyday compromise |
| Fine crosscut | 60+ | Clean cuts across grain, plywood, trim |
| Plywood / laminate | 60–80 | Minimising splintering on veneered faces |
More teeth means a cleaner but slower cut. Fewer teeth clear waste faster and cut quicker, but leave a rougher edge. The blade supplied with a saw is usually a general-purpose compromise — upgrading it is the cheapest meaningful improvement you can make.
For splinter-free plywood, use a high tooth count, set the blade depth so it protrudes only slightly below the workpiece, and cut with the good face downward on a standard circular saw — the teeth enter from below and any tear-out happens on the top face.
Cutting Straight and Safely
- Support the workpiece properly. Sheets on a foam board or sacrificial battens across sawhorses, so the offcut cannot drop, twist or pinch the blade. Never cut between two supports so the middle sags.
- Set the blade depth. The blade should protrude roughly a quarter inch below the material — no more. Excess depth increases kickback risk and exposes more blade than necessary.
- Use a guide. Freehand cuts wander, however careful you are. A clamped straight edge, a track, or even a factory-edge offcut of ply gives genuinely straight results.
- Let the blade reach full speed before it touches the wood.
- Cut with steady, even pressure. Forcing the saw bogs the motor and produces a rough, wandering cut.
- Watch the blade, not the line, once you have started — actually, watch where the blade meets the line, which is the point that matters.
- Keep both hands on the saw where the design allows, and never reach underneath the workpiece.
- Let the blade stop before setting the saw down. Electric brakes make this quick.
⚠️ Never retract the lower guard and hold it open. That guard is the single most important safety feature on the tool. It should swing back on its own as you enter the cut and snap closed when you finish. If it sticks, clean the pivot rather than defeating it.
Kickback and How to Avoid It
Kickback is when the blade binds in the cut and the saw drives violently back toward you. It is the main hazard with this tool and it is almost entirely preventable.
What causes it:
- The kerf closing on the blade — usually because the offcut is unsupported and sags, pinching the cut shut
- Twisting the saw mid-cut so the blade binds against the sides of the kerf
- Blade too deep, exposing more tooth than necessary
- Dull or wrong blade, forcing you to push harder
- Cutting warped or wet timber that closes as it is cut
- Starting the cut with the blade already touching the wood
How to prevent it: support both sides of the cut so nothing pinches, set the blade shallow, keep the shoe flat and the saw square, use a sharp blade, and stand slightly to the side of the cut line rather than directly behind the saw. If the saw binds, release the trigger and let it stop before freeing it.
Common Mistakes
1. Cutting between two supports
Result: the board sags, the kerf closes, the saw kicks back.
Fix: support the full length, or let the offcut fall free.
2. Blade set far too deep
Result: more kickback risk, rougher cuts, more exposed blade.
Fix: about a quarter inch below the material.
3. Cutting freehand and expecting straight
Result: a wandering line no amount of care fixes.
Fix: clamp a straight edge as a guide.
4. Using the supplied blade forever
Result: torn plywood faces and slow, rough cuts.
Fix: match blade tooth count to the material.
5. Good face up on plywood
Result: splintering exactly where it shows.
Fix: good face down with a standard circular saw.
6. Defeating the lower guard
Result: an exposed spinning blade.
Fix: never. Clean a sticking guard instead.
Breaking Down Sheet Goods
Cutting a full sheet of plywood or MDF is the job most people buy a circular saw for, and it is worth a section of its own because doing it badly is genuinely difficult and doing it well is genuinely easy.
The problem with sheets is that they are large, heavy, floppy and awkward to get onto a saw bench. Trying to run a full sheet across a table saw single-handed is far harder and more dangerous than bringing a circular saw to the sheet.
The foam board method is what most people settle on. Lay a sheet of rigid foam insulation on the floor or across sawhorses, put the plywood on top, set the blade depth to just clear the ply, and cut straight through into the foam. Everything is supported, nothing pinches, nothing drops, and the foam is consumable and cheap.
Sawhorses with sacrificial battens work too — lay several lengths of scrap timber across the horses, sheet on top, and cut through into the scrap.
Cut oversize first, then trim. Rough-cut parts slightly larger than final size, then trim to exact dimensions with a guide. It is far easier to make an accurate second cut on a manageable piece than a perfect first cut on a full sheet.
Mark the good face before you start and keep it downward for every cut, so any tear-out lands consistently on the face that will not show.
Guides, Tracks and Jigs
- A clamped straight edge is the cheapest guide there is. Any straight, rigid thing works — a level, aluminium angle, or a ripped strip of ply with a factory edge.
- A shop-made track takes ten minutes: glue a narrow strip of ply onto a wider base, run the saw along it once to trim the base to exact width, and from then on you simply line the base edge up with your cut line. No offset measuring at all.
- Commercial track systems give the cleanest results and include anti-splinter edges, but they cost considerably more and lock you to that brand’s saw.
- A rip fence is supplied with many saws for cuts parallel to an edge — useful for narrow strips.
- A speed square makes a quick guide for crosscuts on narrow boards. Hold it firmly against the edge and run the shoe along it.
The shop-made track is the one worth the effort. It removes the constant mental arithmetic of blade-to-shoe offset, which is where most guided cuts go wrong.
Circular Saw vs Jigsaw vs Mitre Saw
These three get compared constantly, and each is genuinely better at something the others handle badly.
| Tool | Best at | Poor at |
|---|---|---|
| Circular saw | Long straight cuts, breaking down sheets | Curves, fine joinery cuts |
| Jigsaw | Curves, cutouts, shapes | Long straight cuts — it wanders |
| Mitre saw | Accurate repeated crosscuts and angles | Anything wider than its capacity |
| Track saw | Very straight, splinter-free sheet cuts | Cost, and less versatile |
If you own none of them, the circular saw is usually the most useful first purchase — it will break down sheets, cut timber to length, and with a guide it does a passable job of most things. A jigsaw is the natural second tool, because curves are the one thing a circular saw genuinely cannot do.
A mitre saw comes third for most people, and it is a luxury until you start doing trim, framing or anything needing many identical angled cuts — at which point it becomes the tool you use most.
The common mistake is buying a jigsaw first and trying to make long straight cuts with it. Jigsaw blades flex, so the cut wanders and the edge is rarely square. It is the right tool for curves and the wrong one for a straight rip.
Maintenance and Blade Care
- Keep the shoe clean and flat. Resin and pitch build up underneath and stop the saw sliding smoothly. A wipe with solvent and an occasional coat of paste wax makes a noticeable difference to how the saw runs.
- Check the shoe is square to the blade. Most saws have an adjustment for the 90 degree stop. If your cuts are consistently out of square, this is usually why — and it takes two minutes with a square to correct.
- Clean blades rather than replacing them. Most blades that seem blunt are coated in resin, particularly after cutting pine or plywood. Blade cleaning solution or an oven cleaner soak restores the cut dramatically.
- Store blades protected. Carbide teeth chip easily if blades knock against each other in a drawer.
- Clear the lower guard pivot. Sawdust packs into it and makes the guard sluggish, which is exactly when people start holding it open. Blow it out regularly.
- Check the blade is fitted the right way round. Teeth point in the direction of rotation, which on a sidewinder means forward at the bottom of the blade. A reversed blade cuts terribly and is dangerous.
- Unplug or remove the battery before changing blades. Every time, without exception.
Frequently Asked Questions
Is a compact circular saw powerful enough?
For most DIY work, yes. A 6-1/2 inch saw cuts through 2x timber at 90 degrees and handles sheet goods easily, which covers the vast majority of household and garden projects. The limitation appears with thicker stock and with bevel cuts, where the reduced depth bites. If you regularly cut thick timber or bevel through 2x material, a full-size 7-1/4 inch saw is the better choice.
What size circular saw should I buy?
6-1/2 inch is the sweet spot for most people — it clears 2x material, weighs noticeably less than a full-size saw, and blades are widely available. Choose 7-1/4 inch if you cut framing timber regularly or need full depth on bevels. Choose a mini saw only as a supplement for sheet goods, laminate and confined spaces, not as your only circular saw.
How do I cut a straight line with a circular saw?
Use a guide. Clamp a straight edge — a spirit level, a length of aluminium angle, or a factory-cut strip of plywood — parallel to your cut line, offset by the distance from the blade to the edge of the shoe. Run the shoe against it. Freehand cutting always wanders, however steady you are, and a guide costs nothing if you use an offcut. Track saws are simply a refined version of the same idea.
How do I stop plywood splintering?
Four things together: use a high tooth count blade (60 or more), set the blade depth so it only just clears the underside, cut with the good face downward since the teeth enter from below, and put masking tape along the cut line to support the surface fibres. Scoring the line first with a knife also helps considerably on veneered sheets.
Corded or cordless circular saw?
Cordless for convenience — breaking down sheets in a garden, cutting decking, general household work where dragging a cable is a nuisance. Corded for sustained cutting, since saws draw heavily and a day of ripping sheets will work through batteries quickly. If you already own a battery platform, the cordless bare tool is usually the cheapest sensible route.
Cutting Checklist
- Depth of cut at 90° checked against your thickest material
- Blade matched to the material and finish required
- Workpiece supported so the offcut cannot pinch the blade
- Blade depth set to about a quarter inch below the material
- Straight edge clamped as a guide
- Eye and hearing protection on
- Lower guard moving freely — never held open
- Blade at full speed before entering the cut
- Standing slightly to the side of the cut line
- Good face down on veneered sheets
- Blade allowed to stop before setting the saw down
Final Thoughts
A compact circular saw is the right tool for most DIY cutting precisely because it is easier to control. Confidence produces straighter cuts than raw power does.
Check it clears 2x material at 90 degrees, get a saw with a proper magnesium shoe, spend a little on a decent blade, and always clamp a guide. Those four things cover almost everything.
🔧 What to read next: after cutting comes finishing — see dual action sanders for smoothing cut edges, and dust separators for keeping the workshop clear.