How to patch and repair drywall — the right method for every hole size, feathering so the repair disappears, and why priming matters more than you think.
Drywall damage is one of the most common jobs in any home. A door handle through the wall, a shelf that came down, a knock from furniture, a hairline crack above a doorway.
It is also one of the most satisfying repairs, because a well-done patch is genuinely invisible. And the difference between an invisible patch and one you can spot from the doorway comes down to a single principle.
Spread the compound wide and thin, not narrow and thick.
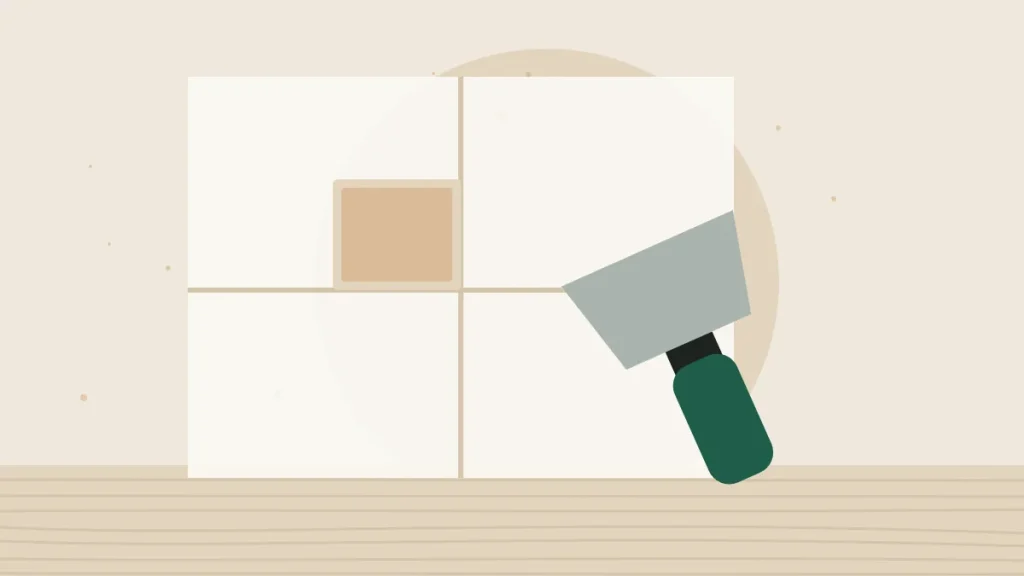
Almost everyone’s instinct is to fill the hole, smooth it flush, and stop. That leaves a small raised island of compound that catches the light and shows forever. The professional approach is to build up a very thin layer spreading well beyond the damage — often three times wider than the hole — so the transition to the surrounding wall is too gradual for your eye to see.
This guide covers the right method for each hole size, plus the priming step almost everyone skips. 💡
Alt text: “Wide taping knife feathering joint compound outward from a drywall patch on a wall”
- Pick your method by hole size
- Which filler or compound to use
- The tools that matter
- Nail holes and small dents
- Medium holes with a patch
- Large holes and the California patch
- Feathering — the actual skill
- Cracks, popped screws and corners
- Sanding without filling the house with dust
- Priming — the step everyone skips
- Common mistakes (and how to fix them)
- Pro tips worth knowing
- What I recommend
- Frequently asked questions
- Your final checklist
Pick Your Method by Hole Size
| Damage | Method | Difficulty |
|---|---|---|
| Nail and screw holes | Filler, one or two coats | ✅ Easy |
| Dents and dings | Filler, feathered | ✅ Easy |
| Up to about 1″ (25mm) | Mesh patch or filler with backing | ✅ Easy |
| 1″–6″ (25–150mm) | Self-adhesive metal/mesh patch | ✅ Straightforward |
| 6″–12″ (150–300mm) | California patch, or backing + insert | Moderate |
| Larger than 12″ | Cut back to studs, fit new board | ⚠️ More involved |
| Water damaged | ⚠️ Find the leak first | ⚠️ Fix the cause |
Which Filler or Compound to Use
The names vary by region but the categories are consistent, and choosing correctly saves a lot of frustration.
| Product | How it hardens | Shrinkage | Best for |
|---|---|---|---|
| Lightweight filler / spackle | Dries by evaporation | Low | ✅ Nail holes, small dents |
| All-purpose joint compound | Dries by evaporation | ⚠️ Moderate | ✅ General patching, taping |
| Lightweight joint compound | Dries by evaporation | Low | ✅ Easy sanding, top coats |
| Setting-type (“hot mud”) | ✅ Chemical reaction | ✅ Very low | ✅ Deep fills, same-day work |
| Ready-mixed tubs | Evaporation | Moderate | ✅ Convenience, small jobs |
Setting-type compound is worth knowing about
This is the one most DIYers have never used, and it solves two real problems.
It hardens by chemical reaction, not by drying out. That means it sets in a predictable time regardless of humidity, and — crucially — you can apply the next coat as soon as it has set rather than waiting for a thick layer to dry all the way through. Sold in bags as a powder you mix, usually labelled with a working time such as 20, 45 or 90 minutes.
It also shrinks very little, which makes it far better for filling deep holes. A deep fill of ordinary drying compound shrinks as the water leaves and sinks below the surface, meaning more coats.
The trade-offs: it is harder to sand than lightweight compound, and once it starts setting in the bucket it is unusable — so mix only what you can apply within the working time.
The Tools That Matter
- Taping knives in more than one width. This is the important one. A narrow knife (around 100mm / 4″) for filling, and a wide knife (250–300mm / 10–12″) for feathering. You cannot feather a patch wide with a narrow blade — the width of the knife sets the width of the blend.
- A hawk or mud pan to hold compound.
- A utility knife for cutting board and trimming loose paper.
- A drywall saw for cutting openings.
- Sanding sponge or pole sander with fine abrasive.
- A detector for cables and pipes.
- Dust sheets, and a work light you can position low.
If you buy one thing, make it a wide taping knife. Almost every visible-patch problem traces back to using a small filling knife for the whole job.
Nail Holes and Small Dents
The quickest repair, and still worth doing properly.
- Clean the hole. Scrape away any raised edge or loose paper around it — a proud lip will show through the filler.
- Press filler in firmly with a flexible knife, pushing it into the hole rather than smearing across it.
- Scrape flush with the knife held at a shallow angle.
- Let it dry, then check. Most fillers shrink slightly and sink. A second thin coat is normal.
- Sand lightly with a fine sponge.
- Prime the spot before painting. Yes, even a nail hole — see below.
For a dent rather than a hole, skim a very thin coat across it with a wide knife and feather the edges. Do not try to fill a shallow dent with a thick blob; it will show more than the dent did.
Medium Holes With a Patch
For anything from about an inch up to roughly six inches, a self-adhesive patch is the straightforward answer.
These are stiff mesh or perforated metal squares with adhesive backing. The metal ones are more rigid and better for larger holes; mesh is fine for smaller ones.
- Trim the hole tidy. Cut away any loose or crumbling board and any torn paper so the surface around the hole is sound and flat.
- Choose a patch that overlaps the hole generously on all sides — an inch or more of contact with solid board.
- Make sure the surface is clean and dry. Adhesive will not stick to dust.
- Press the patch on firmly and smooth it down all round.
- First coat: compound over the whole patch with a narrow knife, pressing it through the mesh. Do not try to bury it in one go.
- Second coat: once set, a wider coat with a bigger knife, extending well past the first.
- Third coat: a very thin skim with your widest knife, feathering to nothing.
- Sand, prime, paint.
Three coats is the standard, and each one goes wider than the last. Trying to do it in one thick coat is the single most common reason patches show.
Large Holes and the California Patch
Beyond about six inches, a self-adhesive patch is not rigid enough. You need actual drywall in the hole.
Method 1 — Backing strips and an insert
- Cut the damage out square. Straight lines are far easier to patch than a ragged shape.
- Cut two strips of timber longer than the hole is wide.
- Insert them behind the board, one above and one below the opening, and screw through the existing wall into each strip.
- Cut a piece of drywall to fit the opening, the same thickness as the existing board.
- Screw the insert to the backing strips.
- Tape the joints with paper or mesh tape, then coat, coat, coat as before.
Method 2 — The California patch (also called a butterfly patch)
This is a neat technique that needs no backing strips, and for medium-to-large holes in open wall areas it is genuinely the better method.
- Cut the damaged area out square.
- Cut a new piece of drywall roughly 50mm (2″) larger than the hole on every side.
- On the back of the new piece, score the paper in a rectangle matching the hole size exactly.
- Snap and remove the gypsum core from the border, peeling it away but leaving the front paper intact. You now have a plug the size of the hole, with a flange of paper all round it.
- Butter the paper flange with compound and press the plug into the hole.
- Smooth the paper flange down onto the wall — it acts as its own tape.
- Coat, feather and finish as normal.
Why it works so well: the paper flange is thinner than tape, so the finished patch sits flatter and needs less compound to hide. There is nothing to screw and nothing behind the wall to manage.
When to cut back to the studs
For very large damage, cut the opening back so its edges land on the centre of a stud on each side. That gives you something solid to screw the new board to, and it is how the wall was built in the first place.
Feathering — The Actual Skill
This is what separates a repair you cannot find from one that shows every time the sun comes through the window.
The principle: your eye does not detect a change in thickness. It detects a change in angle — an edge, a ridge, a shadow line. A patch that rises 2mm over 20mm looks like a bump. The same 2mm spread over 300mm is invisible.
How to feather properly
- Use progressively wider knives. First coat with a 100mm knife, second with 150–200mm, third with 250–300mm. Each coat extends well beyond the last.
- Hold the knife at a low angle and increase pressure at the outer edge, so the compound thins toward nothing.
- Apply pressure on the outside edge of the blade as you pull away from the patch. That is the physical action that creates the taper.
- Aim for the patch to be roughly three times wider than the hole by the final coat.
- Thin coats, always. Three thin coats sand far more easily than one thick one and shrink less.
- Let each coat set or dry before the next.
The width of your widest knife decides how invisible your patch can be. A 100mm filling knife physically cannot feather a repair wide enough to disappear on a flat wall — no amount of technique compensates for that.
| Knife width | Feathers out to about | Result on a flat wall |
|---|---|---|
| 75–100mm (3–4″) | Barely past the hole | ⚠️ Visible ridge — filling only |
| 150mm (6″) | Modest blend | Acceptable on small holes |
| 200mm (8″) | Good blend | ✅ Works for most patches |
| 250–300mm (10–12″) | ✅ Wide, gradual taper | ✅ Genuinely invisible |
| Using one narrow knife throughout | — | ❌ The most common cause of visible patches |
Check with raking light
Hold a work light or torch flat against the wall, shining across the patch. This is how professionals check, and it is brutally revealing — every ridge, every high spot, every knife line shows as a shadow. Fix what the raking light shows before you prime, because it will look exactly the same once painted, only permanent.
Cracks, Popped Screws and Corners
Cracks
Filling a crack with compound alone almost never works — it reopens, because whatever caused the movement is still there. Cracks need reinforcement:
- Widen the crack slightly into a V with a knife, and remove loose material.
- Fill with compound.
- Embed tape over it — paper or mesh — while the compound is wet.
- Coat over the tape and feather wide.
Cracks above door and window openings are common and usually reflect normal settlement stress at the corner. They frequently recur; flexible fillers or a proper taped repair last much longer than plain compound.
Popped nails and screws
A round bump or a small crescent of cracked paint is usually a fastener working loose as the timber behind moves.
- Drive a new screw into the stud about 50mm above or below the popped one, sinking the head just below the surface without tearing the paper.
- Remove or re-sink the original fastener.
- Fill both, in two or three thin coats.
Damaged external corners
Corners have a metal or plastic corner bead behind the compound. If the bead is dented, filling over it will not hold — the damaged section needs cutting out and a new piece fitting before you can build the corner back up.
Sanding Without Filling the House With Dust
Drywall compound sands into extremely fine dust that travels through a whole house and settles on everything.
- Use a sanding sponge rather than paper for small patches — it produces less airborne dust and follows the contour.
- Better still, wet-sand small repairs with a damp sponge. It creates almost no dust at all, though it is slower and takes practice.
- Do not over-sand. Sanding through the compound into the drywall’s paper face raises fuzz that will show through paint. Stop as soon as it is smooth.
- Fine abrasive only — coarse grit leaves scratches you then have to fill.
- Mask doorways and turn off any air handling before you start.
- Wear a mask. Fine dust is an irritant even where the material is not otherwise hazardous.
Our dedicated guide on sanding drywall without dust covers vacuum-assisted sanders and wet sanding in detail.
Priming — The Step Everyone Skips
You have made an invisible patch. You paint the wall. It dries, and the patch is clearly visible as a duller, slightly different patch of colour.
This is called flashing, and it is a porosity problem, not a colour problem. Joint compound is far more absorbent than the painted wall around it. Paint applied over bare compound soaks in, so less sits on the surface — leaving a duller sheen and often a slightly different shade, even with identical paint from the same tin.
On textured walls, you also need to match the texture before priming — a smooth patch on a textured wall shows regardless of paint. Spray texture products exist for this; practise on cardboard to match the pattern and density before applying to the wall.
Painting: two coats over the patch, and where the wall is old, be prepared for the repaired area to look slightly fresher. On a very faded wall the honest answer is often to repaint the whole wall corner to corner.
Common Mistakes (And How to Fix Them)
Mistake 1 — Filling narrow and thick
The fix: wide and thin, three coats, each wider than the last, roughly three times the hole width.
Mistake 2 — Using only a small filling knife
The fix: buy a 250–300mm taping knife. The blade width limits how invisible the patch can be.
Mistake 3 — Not priming before painting
The fix: always prime the whole feathered area. This is why good patches still show.
Mistake 4 — One thick coat instead of three thin ones
The fix: thin coats. They shrink less, sand more easily, and feather properly.
Mistake 5 — Filling a crack without tape
The fix: embed tape. Compound alone will crack again.
Mistake 6 — Patching over damp
The fix: find and fix the leak, let it dry fully, then repair.
Mistake 7 — Sanding through into the paper face
The fix: light pressure, fine abrasive, stop when smooth. Torn paper fuzz shows through paint.
Mistake 8 — Cutting into a wall without checking
The fix: use a detector, and take particular care above and below sockets.
Mistake 9 — Not checking with raking light
The fix: shine a light across the surface before priming. It shows everything.
Mistake 10 — Mixing more setting compound than you can use
The fix: small batches within the working time. Once it goes off in the bucket it is waste.
Pro Tips Worth Knowing
- Cut damage into a square or rectangle. Straight edges are far easier to patch than a ragged hole, even though it means removing sound board.
- Keep the compound clean. A single dried lump on the knife drags a groove through your finish coat. Wipe the blade constantly.
- Do not overwork it. Compound starts to drag and tear if you keep passing over it. Lay it on, smooth once or twice, leave it.
- A slightly damp knife glides better on the finish coat and reduces knife lines.
- Save offcuts of drywall. A spare piece of board makes future patches trivial, and matching thickness matters.
- Fix door handle holes permanently by fitting a door stop. Otherwise you will patch the same spot again.
- Take a photo before you cover anything — pipes, cables, brackets. In five years you will want to know what is behind that wall.
- Keep a small tub of filler and a knife handy. Little dings fixed straight away never become a decorating project.
- Label leftover paint with the room and date. Touching up a patch is easy if you can find the paint.
- Wide feathering hides a lot of imperfection. If a patch is not quite flat, going wider is usually a better fix than sanding harder.
What I Recommend
Most drywall damage in a home is small to medium — door handles, shelf brackets, knocks from furniture. Having patches and filler already in the cupboard is the difference between fixing it this afternoon and looking at it for six months.
Drywall Repair Kit with Patches and Wall Repair Putty
🏆 Best All-In-One KitA complete repair kit combining self-adhesive wall patches with 8.5 oz of ready-mixed repair putty — everything needed for the hole sizes that actually happen in a home. Having the patch and the filler matched in one kit removes the trip to the shop that stops most small repairs getting done.
- ✅ Covers the common damage — door handles, bracket holes, knocks and dents
- ✅ Self-adhesive patches bridge holes too big for filler alone, with no backing strips needed
- ✅ Ready-mixed putty — no mixing, no working-time pressure
- ✅ Everything matched in one kit, so there is no half-finished repair waiting on a missing item
- ✅ Keeps in the cupboard so small damage gets fixed straight away
Prices and availability change often — check Amazon for the current price.
Frequently Asked Questions
Why can I still see my drywall patch after painting?
Almost always because it was not primed. Joint compound is much more absorbent than the painted wall around it, so paint soaks in and dries to a duller sheen and slightly different shade — an effect called flashing. Prime the entire feathered area before painting and it disappears. The other common cause is a patch that was filled narrow and thick, leaving a shadow line the eye picks up.
How wide should I spread the compound?
Much wider than feels necessary — aim for the finished patch to be roughly three times the width of the hole. Your eye detects changes in angle, not thickness, so spreading the same amount of compound over a much larger area makes the transition too gradual to see. This is why a wide taping knife of 250–300mm matters more than any other tool.
What is setting-type compound and do I need it?
It hardens by chemical reaction rather than drying out, so it sets in a predictable time, shrinks very little, and lets you apply the next coat as soon as it has gone off instead of waiting for a thick layer to dry through. That makes it excellent for filling deep holes and for finishing a repair in one day. It is harder to sand, so many people use setting compound to fill and lightweight compound for the final skim.
How do I fix a hole bigger than a patch will cover?
Use a California patch. Cut the damage out square, cut a new piece of drywall about 2 inches larger all round, score and snap away the gypsum core from that border on the back leaving the front paper intact, then butter the paper flange with compound and press the plug into the hole. The paper acts as its own tape and sits flatter than conventional tape. For very large damage, cut back so the edges land on studs and screw in a new piece.
Why does the crack keep coming back?
Because compound alone has no strength across a moving joint. Cracks need reinforcement — widen the crack slightly, fill it, embed paper or mesh tape into the wet compound, then coat over and feather wide. Cracks above doors and windows are common settlement stress points and are especially prone to returning if only filled. Also make sure nothing structural is causing ongoing movement.
Can I patch a wall that has water damage?
Not until you have found and fixed the source and the area is completely dry. Patching over damp guarantees the repair fails, and it can conceal a developing mould problem behind the wall. Trace the leak first, repair it, allow the wall to dry fully, then cut out any softened or crumbling board before patching. If the damage is extensive or long-standing, have the cause properly assessed.
Your Final Checklist
- Check for cables and pipes before cutting into any wall
- Find and fix the source of any water damage first
- Match the method to the hole size
- Cut damage into a square for easier patching
- Remove loose board and torn paper around the damage
- Setting compound to fill, lightweight to finish
- Three thin coats, never one thick one
- Each coat wider than the last — finish around three times the hole width
- Use progressively wider knives, up to 250–300mm
- Embed tape in any crack repair
- Check with raking light before priming
- Sand lightly with fine abrasive — do not go through the paper
- Match any texture before priming
- Prime the whole feathered area — never skip this
- Two coats of paint, and consider painting corner to corner
Next in this series: sanding drywall without dust and hanging shelves and fixing into walls.