How to use a chisel — paring versus chopping, reading grain so it does not dive, and the knife-wall trick for crisp shoulders.
A chisel is the simplest tool in the workshop and one of the hardest to use badly-but-safely. It is a sharp wedge you push through wood, and everything about using it well comes down to controlling where that wedge goes.
Two things decide that, and beginners usually know neither.
First, the grain steers the chisel. Wood splits along its fibres. Push a chisel into grain that slopes away from your surface and it follows the fibres downward, diving into your workpiece and taking a chunk with it. Read the grain and work the other way and it slices cleanly.
Second, a sharp chisel is a safe chisel. This sounds like a slogan and it is simple physics. A dull chisel needs force. When force finally overcomes the resistance, the tool moves suddenly and unpredictably — usually toward whatever is holding the wood. A sharp chisel goes where you point it with hand pressure alone.
So: sharpen it, read the grain, clamp the work, and keep both hands behind the edge. 💡
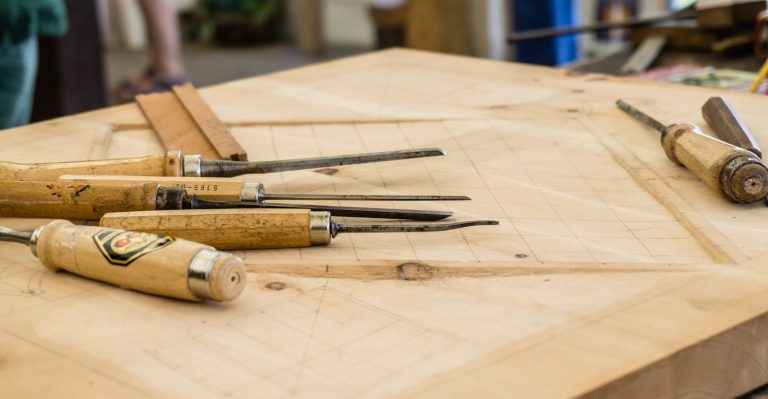
Alt text: “Bench chisel paring a joint shoulder with the flat back down and both hands behind the cutting edge”
- Types of chisel
- The safety rules that matter
- Bevel up or bevel down?
- Reading grain so it does not dive
- Paring technique
- Chopping with a mallet
- The knife wall — crisp shoulders every time
- Chopping a mortise
- Everyday chisel jobs
- Sharpness and care
- Common mistakes (and how to fix them)
- Pro tips worth knowing
- What I recommend
- Frequently asked questions
- Your final checklist
Types of Chisel
| Type | Shape | Best for | Mallet? |
|---|---|---|---|
| Bevel-edge bench chisel | Bevelled sides | ✅ The all-rounder | ✅ Light mallet work |
| Firmer chisel | Square sides, thicker | Heavier general work | ✅ Yes |
| Mortise chisel | Thick, deep section | ✅ Chopping mortises, levering | ✅ Heavy blows |
| Paring chisel | Long, thin, low angle | ✅ Fine hand paring | ❌ Hand pressure only |
| Corner chisel | L-shaped edge | Squaring corners | ✅ Yes |
If you buy one set, buy bevel-edge bench chisels. The bevelled sides let the chisel reach into acute corners — dovetails especially — and they handle both hand paring and light mallet work. A set of four or six covers most of what a home workshop needs.
The Safety Rules That Matter
Chisel injuries are common and follow a very predictable pattern: the tool slips forward, and whatever was in front of it gets cut.
- Both hands behind the cutting edge, always. This is the rule. If your hand is anywhere in front of the edge, a slip cuts it.
- Never hold the workpiece in your hand while chiselling it. Clamp it, put it in a vice, or brace it against a bench stop. Holding work in one hand and a chisel in the other means your hand is directly in the tool’s path.
- Never cut toward your body. Especially not toward your thigh — a chisel slipping into a femoral artery is a genuine emergency.
- Keep it sharp. Force is the enemy. A dull chisel needs pushing hard, and it releases that force all at once.
- Use a mallet, not a steel hammer. A steel hammer face damages the handle and can shatter a plastic one.
- Take small cuts. A chisel trying to remove too much at once will dive, bind, or skate off.
- Watch where the chisel goes if it slips. Before each cut, look at the exit path and make sure nothing important is in it.
- Store them protected. A chisel loose in a drawer damages its edge and cuts the hand that reaches in. A roll, a rack or edge guards.
Every experienced woodworker has a story about a chisel slip, and in almost every one of them the workpiece was being held by hand rather than clamped. Clamp the work. It is the difference between a slip that gouges the wood and one that goes into your palm.
Bevel Up or Bevel Down?
One of the most common questions, and the answer is genuinely simple once you see why.
A chisel has two faces: a flat back and a bevelled front. Whichever one is against the wood becomes your reference surface.
Flat back down — for flat surfaces
When you want the chisel to travel along a flat plane — paring a joint shoulder, cleaning a rebate floor, trimming a proud plug — put the flat back against the surface. The flat rides on the wood and keeps the cut level. Bevel up.
Bevel down — for removing waste
When you want the chisel to scoop material out — hogging waste from a recess, starting a mortise — put the bevel down. The bevel acts like a ramp, steering the edge upward and out of the cut so it does not dive into your workpiece.
| Task | Orientation | Why |
|---|---|---|
| Paring a shoulder flat | ✅ Flat back down | Flat rides the surface |
| Cleaning a rebate or dado floor | ✅ Flat back down | Keeps it level |
| Trimming a plug or dowel flush | ✅ Flat back down | Cuts flush, not below |
| Hogging waste from a recess | ✅ Bevel down | Bevel steers the edge up and out |
| Starting a mortise | Bevel down | Controls the dive |
| Final mortise walls | Flat back to the wall | Leaves a true face |
Reading Grain So It Does Not Dive
This is the skill that separates clean chisel work from torn, gouged chisel work.
Wood fibres run in lines, and a chisel is a wedge. A wedge pushed into a bundle of fibres will follow those fibres — splitting along them rather than cutting across them. If the fibres slope down into your workpiece, the chisel dives with them and lifts out a chunk far deeper than you intended.
How to read it
Look at the edge or the face of the board. The grain lines run at a slight angle to the surface, like tiles on a roof. Cut “downhill” — in the direction where the fibres slope up and away from the surface — and each fibre is supported by the one below it, so it shears cleanly.
The practical test: take a very light cut. If it slices off a clean shaving, you are going the right way. If it starts to split ahead of the edge and dive, stop and work from the other direction.
Working toward the middle
For a shoulder or a recess, work in from both ends toward the middle. That way you are always cutting with the grain at each end, and any tearout happens in the waste at the centre where you will remove it anyway. Never run a cut out over an edge — the unsupported fibres at the far side will break out.
Difficult grain
Figured, curly and interlocked timber has grain that reverses within a single piece, so there is no correct direction. Take much lighter cuts, use a very sharp chisel, and consider skewing the chisel — angling it in the cut so it slices rather than splits.
Paring Technique
Paring is cutting by hand pressure alone, no mallet. It is how you sneak up on a fit.
- Clamp the work. Both hands are going on the chisel.
- Grip the handle with your dominant hand, and use the other hand on the blade near the edge as a guide and a brake — fingers behind the edge, controlling the blade against the work.
- Get your body behind it. Stand so you can lean into the cut using your shoulder and body weight rather than just your arm. That gives far more control than pushing with your arm alone.
- Take thin shavings. Paring is a finishing operation — you should be removing slivers, not chunks.
- Skew the chisel slightly as you push. Slicing at an angle cuts far more cleanly than pushing straight in, exactly as a knife slices better than it presses.
- Check as you go. Straight edge, square, or dry-fit the joint. It is very easy to take one shaving too many.
Paring end grain needs the sharpest edge you have and the lightest cuts. End grain is unsupported fibres, so it crushes rather than cuts if the chisel is at all dull. Support the far edge with a scrap of waste so the fibres cannot break out at the exit.
Chopping With a Mallet
Chopping removes material faster, with controlled mallet blows.
- Use a wooden or urethane mallet, not a steel hammer. A hammer face damages handles and can shatter plastic ones.
- Hold the chisel vertically and let the mallet do the work. Controlled taps beat big swings.
- Start inside your line. Chopping right on the line first time drives the chisel back past it, because the wedge pushes fibres sideways as it enters. Work close, then pare to the line.
- Work in layers. Take a shallow amount across the whole area, then go deeper, rather than trying to reach full depth in one place.
- Alternate chopping and clearing. Chop across the grain to sever fibres, then pare or lever the loosened waste out.
- Keep the work solidly supported. Chopping on a springy bench wastes the energy of every blow.
The Knife Wall — Crisp Shoulders Every Time
This is the best single technique in hand tool work, and it costs nothing.
The problem: a pencil line is thick and vague, and when you chisel up to it the fibres at the edge tear rather than cutting cleanly, leaving a fuzzy shoulder.
The solution: instead of marking with a pencil, cut the line with a marking knife. That does two things. It gives you a line with no width. And it severs the surface fibres, so they cannot tear when you chisel up to them.
How to make a knife wall
- Score the line with a marking knife against a square. Light pass first, then deepen it.
- Pare a small V-groove on the waste side of the knife line, using the chisel at an angle. This creates a narrow trench beside the line.
- Deepen the knife line into that trench.
- Repeat until you have a clear vertical wall on the good side and a sloping trench on the waste side.
- Now work the waste away. The chisel can drop into the trench and register hard against the vertical wall, which acts as a perfect guide.
Why it works so well: the wall physically stops the chisel going past the line, and the severed fibres mean the shoulder comes out crisp instead of furry. It also gives your saw somewhere to start if you are sawing the shoulder.
Chopping a Mortise
A mortise is a rectangular hole for a tenon. Chopping one by hand is very satisfying and quite straightforward.
- Mark it out with a mortise gauge, and knife the ends.
- Clamp the work over a solid bench leg if you can, so the blows are supported rather than bouncing the bench.
- Use a mortise chisel the same width as the mortise. Then the walls need no paring — the chisel width defines them.
- Start in the middle, a little in from each end.
- Chop straight down, bevel facing the waste, and work along in small steps, levering the chip out as you go.
- Work in layers, going deeper with each pass rather than trying for full depth at once.
- Leave the ends until last, then pare them square back to the knife lines.
- Check depth and square regularly, and test-fit the tenon.
The classic error is going for full depth immediately. Work across the length in shallow layers — it is faster, more accurate and far less tiring.
Everyday Chisel Jobs
Most chisel use is not fine joinery. It is these:
| Job | Approach |
|---|---|
| Cutting a hinge recess | ✅ Knife the outline, chop across, pare the floor flat |
| Trimming plugs and dowels flush | ✅ Flat back down, work in from the edges |
| Cleaning band saw or router corners | ✅ Pare with the flat back registering on the surface |
| Removing dried glue squeeze-out | ✅ Hold the chisel flat and slice it off |
| Adjusting a door latch plate | Knife the outline first, then pare |
| Cleaning up a tenon cheek | Flat back down, light paring cuts |
| Opening a paint tin | ❌ Use a screwdriver — this ruins edges |
Removing glue squeeze-out is worth highlighting. Waiting until the glue is rubbery and lifting it off with a chisel held flat is the cleanest method, because nothing gets smeared into the grain — which matters a great deal if the piece will be stained. See our guide on gluing and clamping wood.
Sharpness and Care
Everything in this guide assumes a sharp chisel. A dull one is slower, less accurate and more dangerous.
- Touch up often, not rarely. Thirty seconds on a strop mid-project keeps an edge going far longer than waiting until it is blunt.
- Learn to feel when it changes. A sharp chisel slices end grain leaving a shiny surface; a dull one crushes and leaves a dull, torn one.
- Never chisel toward metal. Screws, nails, staples — one contact and the edge is chipped.
- Watch for grit in reclaimed timber and on surfaces that have been on the floor.
- Do not use them as screwdrivers, scrapers or pry bars. A chisel is an edge tool.
- Store with the edge protected. A roll, a rack, a block, or plastic edge guards.
- Wipe them before putting them away. Hand moisture causes rust spots on the polished back, and a rusty back is no longer flat.
Full technique is in our guide on sharpening chisels and plane blades.
Common Mistakes (And How to Fix Them)
Mistake 1 — Holding the workpiece in your hand
The fix: clamp or vice, every time. This is the mistake behind most chisel injuries.
Mistake 2 — Working with a dull chisel
The fix: sharpen. Force is what makes chisels dangerous, and dull tools need force.
Mistake 3 — Cutting against the grain
The fix: read the slope and cut downhill, or work in from both ends toward the middle.
Mistake 4 — Chopping directly on the line first time
The fix: chop inside the waste, then pare to the line.
Mistake 5 — Wrong bevel orientation
The fix: flat back down for flat surfaces, bevel down for scooping waste out.
Mistake 6 — Levering with a bench chisel
The fix: mortise chisels are for levering. Bench chisels snap.
Mistake 7 — Using a steel hammer
The fix: a wooden or urethane mallet.
Mistake 8 — Taking too much at once
The fix: small cuts and shallow layers. Big bites dive and tear.
Mistake 9 — Marking with a pencil for joinery
The fix: a knife line, and a knife wall for shoulders.
Mistake 10 — Chisels loose in a drawer
The fix: roll, rack or guards. Protects the edges and your hand.
Pro Tips Worth Knowing
- Keep a strop on the bench. A few passes between cuts maintains an edge indefinitely without touching a stone.
- Clamp a guide block along your line for a critical square cut. The chisel registers against it and cannot wander.
- Use a scrap behind end grain so the fibres cannot break out at the exit.
- Pare in from both edges on a wide surface so no cut ever runs out over an edge.
- Buy a wider chisel than you think. Wide chisels register better on flat surfaces; narrow ones tend to rock and dig in.
- Sharpen a spare cheap chisel for rough work — scraping paint, opening things, prying — so your good ones stay sharp.
- Mark the waste with pencil hatching. Cutting the wrong side of a joint is a genuinely common and expensive mistake.
- Chop over a bench leg so blows are supported rather than flexing the benchtop.
- Light from the side shows whether a pared surface is truly flat far better than overhead light.
- If a cut feels like it needs force, stop. Either the chisel is dull or you are going against the grain. Both have easy fixes; forcing has none.
What I Recommend
A set of bevel-edge bench chisels in a few common widths covers hinge recesses, joint cleaning, plug trimming and general paring — which is the vast majority of what chisels actually get used for.
EZARC 6-Piece Wood Chisel Set with Wooden Case
🏆 Best Starter SetA six-piece woodworking chisel set supplied in a wooden storage case. Six widths means you can pick one that suits the cut rather than forcing a narrow chisel across a wide surface — and the case matters more than it sounds, because chisels loose in a drawer lose their edges and cut the hand that reaches in.
- ✅ Six widths so you can match the chisel to the cut — wide chisels register far better on flat surfaces
- ✅ Wooden case protects the edges, which is what keeps chisels usable
- ✅ Covers the everyday jobs: hinge recesses, plug trimming, cleaning joints, removing glue
- ✅ A sensible starting point — technique and sharpening matter more than chisel price
- ✅ Sharpen them properly before first use and they will perform well above their cost
Prices and availability change often — check Amazon for the current price. Any chisel, at any price, needs sharpening properly before it will do good work.
Frequently Asked Questions
Should the bevel face up or down?
Flat back down when you want a flat result — paring a joint shoulder, cleaning a rebate floor, trimming a plug flush. The flat back rides on the surface and keeps the cut level. Bevel down when you are removing waste from a recess, because the bevel acts as a ramp that steers the edge upward and out instead of letting it dive into the workpiece.
Why does my chisel dive into the wood?
Because you are cutting against the grain. A chisel is a wedge, and wood splits along its fibres — if the grain slopes down into the workpiece, the chisel follows it and lifts out a chunk. Look at the grain lines on the edge of the board and cut in the direction where the fibres slope up and away from the surface. Take a light test cut; if it splits ahead of the edge rather than slicing, work from the other direction.
What is a knife wall and why bother?
It is a knife line deepened into a small trench, giving the chisel a vertical wall to register against. It solves two problems at once: a knife line has no width, unlike a pencil line, and scoring severs the surface fibres so the shoulder comes out crisp instead of fuzzy. The chisel then drops into the trench and cannot travel past the line. For anything that has to fit, it is the single best hand-tool technique there is.
Can I hit a chisel with a hammer?
Use a wooden or urethane mallet instead. A steel hammer face damages wooden handles over time and can crack or shatter plastic ones. A mallet also delivers a softer, more controlled blow, which is what you want — chisel work is about repeated controlled taps rather than big swings. Paring chisels should never be struck at all; they are designed for hand pressure only.
Why does my joint come out loose even though I cut on the line?
Because a chisel is a wedge and pushes wood sideways as it enters, so a cut made exactly on the line finishes slightly past it. Chop a millimetre or two inside the waste first, remove the bulk, then pare back to the line with light finishing cuts. Marking with a knife rather than a pencil helps too, since a pencil line has real width and it is easy to lose track of which side you are cutting to.
Are sharp chisels really safer than dull ones?
Yes, and it is straightforward physics rather than a slogan. A dull chisel needs significant force to cut, and when the resistance finally gives way the tool moves suddenly and unpredictably — usually toward whatever is holding the wood. A sharp chisel cuts under controlled hand pressure and goes where you point it. Combine sharpness with clamping the work and keeping both hands behind the edge and you have covered nearly every chisel injury.
Your Final Checklist
- Sharpen first — dull chisels are slower and more dangerous
- Clamp the workpiece — never hold it in your hand
- Both hands behind the edge, never cutting toward your body
- Check the slip path before each cut
- Mark with a knife, and build a knife wall for shoulders
- Hatch the waste so you cut the right side
- Read the grain and cut downhill
- Work in from both ends toward the middle
- Flat back down for flat surfaces, bevel down for waste
- Chop inside the line, then pare back to it
- Shallow layers, small cuts
- Mallet, not hammer; never lever with a bench chisel
- Support end grain with scrap at the exit
- Strop between cuts to keep the edge keen
- Store with the edges protected
Next in this series: sharpening chisels and plane blades and how to use a hand planer.