Dual action means no swirl marks — which is exactly what you need before stain or varnish. Here is how to choose one for woodwork.
⚡ The Short Answer
For woodworking, a 5″ electric dual action (random orbital) sander with variable speed is the single most useful sander you can own. It spins and orbits at once, so it never leaves the circular swirls that show up the moment you apply stain.
Look for variable speed, a hook-and-loop 5″ pad and a dust port. That combination handles everything from levelling a glued-up panel to keying varnish between coats.
You do not need compressed air. The pneumatic DA sanders you see in body shops do the same job, but for wood an electric one is simpler, cheaper to run and just as capable.
Walk into any woodworking shop and you will find a random orbital sander within arm’s reach of the bench. It is not the fastest sander, and it is not the most precise — but it is the one that produces a surface you can put a finish on without regret.
The confusion is in the naming. Dual action, DA and random orbital all describe the same mechanism. Automotive people say DA; woodworkers say random orbital. This guide uses both, explains what the mechanism does for wood specifically, and covers where it beats a sheet sander or a belt sander.
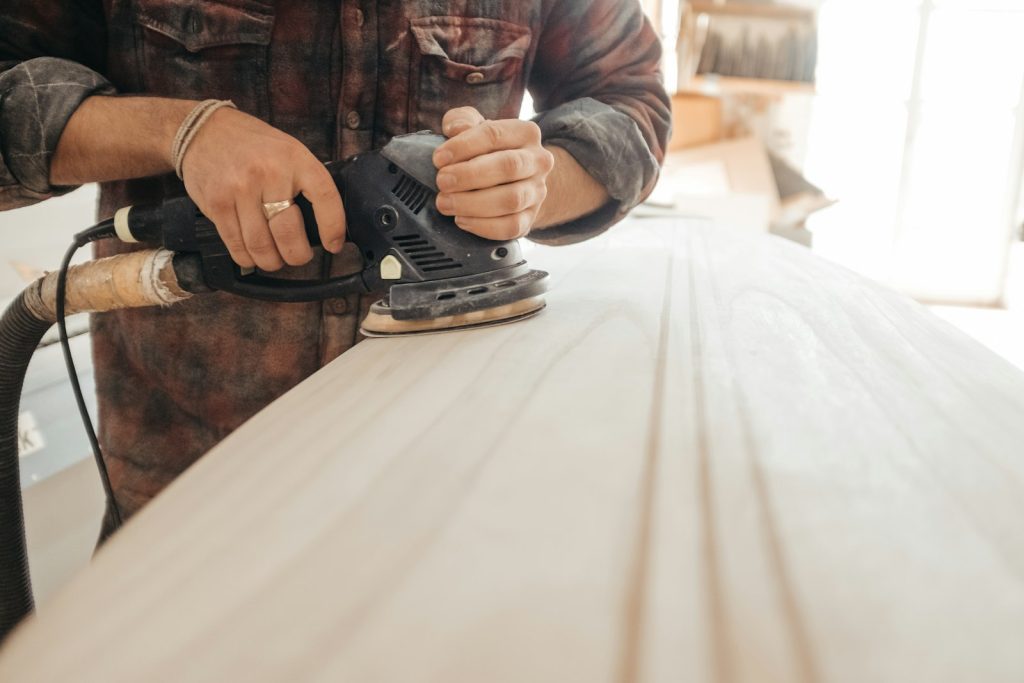
Dual Action Explained for Woodworkers
Two movements happen at the same time. The round pad spins on its axle, and the whole axle also travels in a small orbit, typically 1/8″ or 3/32″ across. Because those two motions are not synchronised, no abrasive grain ever retraces its own path.
Why does that matter on wood specifically? Because of what happens when you apply finish.
Bare sanded wood looks fine to the eye whatever tool you used. The moment stain, oil or varnish goes on, everything changes. Finish sinks deeper into scratches than into flat surfaces, so scratches go darker. A circular scratch pattern from a rotary tool becomes a set of visible dark rings. A random pattern from a DA sander has nothing to see — the scratches are there, but they do not form a pattern your eye can pick out.
That is the entire value proposition. Same smoothness, invisible instead of visible once finished.
Jobs a dual action sander does well:
- Levelling glued-up panels — tabletops, worktops, door blanks
- Preparing bare wood before stain or oil
- Keying between finish coats at high grits
- Removing old varnish from furniture
- Smoothing after a planer or belt sander has done the heavy work
- General DIY — shelves, skirting, doors, garden furniture
🪵 The rule: belt sander to make it flat, dual action to make it smooth, hand sanding to make it perfect. Each tool has one job.
DA vs Sheet Sander vs Belt Sander
These three get confused constantly, and buying the wrong one is a common and expensive mistake.
| Tool | Motion | Best at | Leaves | Gets into corners |
|---|---|---|---|---|
| Dual action / random orbital | Spins and orbits | Smoothing, finishing, general prep | Random, invisible pattern | ❌ Round pad — no |
| Sheet / palm sander | Small square vibration | Flat panels, getting into corners | Fine straight-ish pattern | ✅ Square pad — yes |
| Belt sander | Continuous loop | Fast removal, levelling rough stock | Straight deep scratches | ❌ No |
| Detail / mouse sander | Small orbit, pointed pad | Tight corners, spindles, trim | Fine pattern | ✅ Best of all |
Choose the dual action if you want one sander for most work. It is the best general-purpose choice by a wide margin.
Add a sheet sander if you often work into corners — the round pad of a DA physically cannot reach a 90 degree internal corner, which frustrates people who bought only a DA.
Add a belt sander if you deal with rough-sawn timber or decking. A DA will get there eventually, but you will lose an afternoon and a lot of discs.
Specs That Matter for Wood
- Variable speed — the most valuable feature. Low speed for veneer, thin panels and keying between coats; high speed for stripping and levelling. Running flat out on delicate work burns and dishes the surface.
- Pad size — 5″ is the standard and has the widest, cheapest disc availability. 6″ covers big panels faster but is more awkward on narrow rails and stiles.
- Orbit size — a larger orbit (around 1/8″) removes material faster; a smaller one (3/32″) leaves a finer finish. Larger is generally more useful for wood.
- Dust extraction — matters more on wood than anything else. Wood dust clogs discs fast, and a clogged disc stops cutting and starts burnishing. A vacuum port roughly doubles disc life.
- Hook and loop discs — essential. You will change grit several times per project, and peel-and-stick discs make that a chore.
- Vibration control — a counterweight is the difference between comfortably sanding a tabletop and giving up halfway.
- Weight and balance — you may hold this above shoulder height on a door or a ceiling panel.
✅ Buy discs in bulk before you start. The most common reason people rush a finish is running out of the grit they need halfway through. Keep 80, 120, 180 and 220 on the shelf.
Our Picks
Selected on published specifications and owner ratings rather than hands-on testing.
DEWALT Random Orbit Sander, Variable Speed, 5-Inch (DWE6423)
Best Overall for Wood★★★★★ 4.7 out of 5 — the sensible default
This is the one to buy if you want a single sander that handles everything. Variable speed from 8,000 to 12,000 OPM covers aggressive levelling right down to gentle keying between varnish coats, and the separate counterweight makes a genuine difference to how long your hands last on a big tabletop.
- ✅ Variable speed — slow for veneer and finish coats, fast for stripping
- ✅ Counterweight design genuinely reduces fatigue over long sessions
- ✅ 5″ discs are the cheapest and most available abrasive on the market
- ✅ Doubles for light bodywork if you ever need it
- ⚠️ Round pad cannot reach internal corners — pair with a detail sander
- ⚠️ Best for: furniture, panels, doors, general woodworking and DIY
Price and availability change often — the button shows the live Amazon price.
Makita BO5030K 5″ Random Orbit Sander with Tool Case
Best Simple Workhorse★★★★★ 4.8 out of 5 — highest rated here
Sometimes fewer features is the point. A 3.0 amp motor at a fixed 12,000 OPM, a rubberised grip and a carry case — nothing to adjust, nothing to go wrong. If you mostly sand bare hardwood and softwood at normal speeds, a single-speed tool with a strong reliability record is a perfectly rational buy.
- ✅ 4.8 rating — the strongest track record in this list
- ✅ Rubberised grip for comfort and control
- ✅ Case included keeps the pad clean between jobs
- ⚠️ Single speed — less suited to veneer and delicate finish work
- ⚠️ Best for: straightforward bare-wood sanding where you want reliability over features
Price and availability change often — the button shows the live Amazon price.
Makita XOB01Z 18V LXT Cordless 5″ Random Orbit Sander
Best Cordless★★★★★ 4.8 out of 5 — freedom to move
Sanding involves constantly repositioning around a workpiece, and a trailing cord catches on corners every time. Three speeds — 7,000, 9,500 and 11,000 OPM — cover finishing through removal, and the 1/8″ orbit is on the larger side, so it removes material faster than many 5″ sanders.
- ✅ No cord — a real advantage on furniture and site work
- ✅ Three defined speeds rather than a vague dial
- ✅ Large 1/8″ orbit for faster removal
- ⚠️ Tool only — needs LXT batteries, so it suits existing Makita owners
- ⚠️ Best for: anyone already on the Makita battery platform
Price and availability change often — the button shows the live Amazon price.
Comparison
| Model | Power | Speed | Variable | Rating | Best for |
|---|---|---|---|---|---|
| DEWALT DWE6423 | Corded | 8,000–12,000 | ✅ Yes | 4.7 | Best all-rounder for wood |
| Makita BO5030K | Corded | 12,000 fixed | ❌ No | 4.8 | Simple and reliable |
| Makita XOB01Z | 18V battery | 7,000–11,000 | ✅ 3 speeds | 4.8 | Cordless freedom |
| DEWALT DWE6411 (sheet) | Corded | 14,000 OPM | ❌ No | 4.8 | Corners a round pad cannot reach |
| Ingersoll Rand 328B | Air | Geared DA | — | 4.7 | Bodywork with shop air |
💬 Affiliate disclosure: as an Amazon Associate, DetailSanderGuide may earn from qualifying purchases. This costs you nothing extra and never changes which tools we recommend.
Grit Sequence for Wood
Wood is more forgiving than car panels, but skipping grits still costs you — coarse scratches show up dramatically once stain goes on.
| Grit | Use it for | Speed setting |
|---|---|---|
| 60–80 | Stripping old finish, levelling rough or uneven stock | High |
| 100–120 | General smoothing after coarse work | Mid to high |
| 150–180 | Preparing softwood for finish — usually the stopping point | Mid |
| 220 | Hardwood before stain or oil | Low to mid |
| 320–400 | Keying lightly between coats of varnish or lacquer | Low |
Do not over-sand. Going beyond 220 on wood that will be stained can actually be counterproductive — it burnishes the surface closed so the stain cannot penetrate, giving a patchy, washed-out result. For most projects, 180 on softwood and 220 on hardwood is the right place to stop.
Our grit progression planner builds the ladder for your wood and finish, and the sanding project calculator works out how many discs to buy.
Technique That Avoids Swirls
- Start the tool on the wood, not in the air. Unlike a belt sander, a DA is gentle enough to rest on the surface first. Starting it in mid-air and dropping it down risks landing on an edge and gouging.
- Keep the pad flat. Tipping onto an edge puts all the cutting into a small area and digs a groove. This is the number one cause of dips on a tabletop.
- Do not press. The tool’s weight is the correct pressure. Pressing slows the orbit and turns a dual action sander into a rotary one — which brings the swirl marks straight back.
- Move slowly. Roughly one inch per second. Rushing leaves unsanded bands that only appear after finish goes on.
- Overlap by half the pad on each pass, and work in one direction then cross over in the other for even coverage.
- Keep it moving. Pausing creates a shallow dish that is invisible until light hits it at an angle.
- Finish by hand with the grain at your final grit. A couple of light hand passes remove any residual pattern and it takes two minutes.
The single most common mistake is pressing down to make it cut faster. It does the opposite — it slows the orbit, clogs the disc and creates the exact marks you were trying to avoid.
Common Mistakes and Fixes
1. Pressing down hard
Result: swirl marks, clogged discs, a dished surface.
Fix: let it float. If it is cutting too slowly, drop a grit.
2. Skipping grits
Result: deep scratches that only appear once stain goes on.
Fix: step through in increments — 80, 120, 180, 220.
3. Tipping the pad on an edge
Result: rounded-over edges and gouges on panel corners.
Fix: keep the pad flat, and let it overhang no more than about a third when working near an edge.
4. Sanding past 220 before staining
Result: burnished wood that will not absorb stain evenly, giving a blotchy finish.
Fix: stop at 180 for softwood, 220 for hardwood.
5. No dust extraction
Result: discs clog in seconds, stop cutting, and start polishing instead.
Fix: connect a vacuum. It roughly doubles disc life and dramatically improves finish.
6. Expecting it to reach corners
Result: frustration on cabinets, frames and panelling.
Fix: a round pad physically cannot reach an internal 90 degree corner. Add a detail or sheet sander.
7. Using it to remove a lot of material
Result: hours of work and a mountain of used discs.
Fix: use a belt sander or planer for heavy removal, then switch to the DA to smooth.
Pro Tips
- Vacuum instead of the bag. The single biggest upgrade to finish quality and disc life. Wood dust clogs abrasive faster than anything else.
- Pencil scribbles for coverage. Light marks across the surface disappear as you sand evenly. Anything left is a spot you missed.
- Raise the grain between coats. On bare wood that will get a water-based finish, wipe with a damp cloth, let it dry, then sand lightly at your final grit. The fibres that would have lifted under the finish are removed first.
- Keep one sander loaded with fine grit. If you own two sanders, dedicating one to 220 saves constant disc changes on finishing days.
- Check the pad hooks. When discs start flying off mid-use, the hook-and-loop backing is worn — replacement pads are inexpensive and restore the tool completely.
- Slow down for veneer. Veneer can be under a millimetre thick. Low speed, fine grit, and check constantly.
- Let the tool cool. Long sessions heat the motor and the pad. A warm pad clogs faster.
Real-World Examples
The tabletop that looked perfect until it was stained
Extremely common. Bare wood looks flawless, then stain reveals a pattern of faint circles across the whole surface. The cause is pressing too hard, which stalls the orbit. The fix costs nothing: let the tool float, and finish with two light hand passes along the grain before staining.
The cabinet doors with dark corners
Someone sands a set of panelled doors with a 5″ round pad and finds the corners stay darker after finishing. The round pad simply never reached into them, so the old finish is still there. A detail sander or a folded piece of paper by hand solves it — no amount of extra passes with a round pad will.
The pine shelves that went blotchy
Pine and other softwoods absorb stain unevenly at the best of times, and sanding to a very high grit makes it worse by closing the surface. Stopping at 150–180 and using a pre-stain conditioner gives a far more even result than sanding to 320 and hoping.
Frequently Asked Questions
Is a dual action sander the same as a random orbital sander?
Yes — they describe the same mechanism, where the pad spins and orbits simultaneously so the abrasive never repeats its path. “DA” is the term used in automotive work; “random orbital” is the woodworking term. The main practical difference you will see is the power source: automotive DA sanders are often pneumatic, while woodworking random orbitals are usually electric.
What grit should I finish at before staining?
150–180 for softwoods like pine and cedar, 220 for hardwoods like oak and maple. Resist going finer. Sanding beyond about 220 burnishes the surface and closes the pores, which prevents stain penetrating evenly and gives a patchy, washed-out result. If you want a glassier finish, achieve it with the finish coats rather than with more sanding of the bare wood.
Why does my sander leave swirl marks on wood?
Almost always because you are pressing down. Pressure slows or stops the orbit, so the pad only spins — and a spinning-only pad leaves circular scratches. Other causes are a worn or clogged disc (which makes you press harder), or a coarse grit particle trapped under a fine disc. Let the tool float, fit a fresh disc, vacuum the surface between grits, and finish by hand along the grain.
Can I use a dual action sander on a car?
Yes. An electric random orbital will prepare car panels perfectly well — the finish depends on grit sequence and technique rather than on the power source. Professional shops prefer pneumatic DA sanders because they are lighter over a full working day and can run continuously, but for a home restoration an electric one is entirely capable. See our auto bodywork guide for the full panel process.
5 inch or 6 inch pad for woodworking?
5 inch for almost everyone. Discs are cheaper, more widely stocked in every grit, and the smaller pad is easier to control on narrow pieces like rails, stiles and shelf edges. A 6 inch pad covers large flat surfaces faster, which suits worktops and big tabletops, but it becomes unwieldy on anything narrow and there is less disc choice on the shelf.
Do I need variable speed?
If you work with veneer, thin panels, or key between finish coats — yes, it is genuinely useful. Low speeds give control and reduce the risk of burning through. If you only ever sand bare solid timber at normal speeds, a good fixed-speed sander like the Makita BO5030K is perfectly adequate and has an excellent reliability record.
Your Checklist
- Vacuum connected to the dust port, not just the bag
- Discs stocked in 80, 120, 180 and 220
- Speed matched to material — low for veneer and finish coats
- Pad kept flat, never tipped onto an edge
- No downward pressure — let the tool float
- Passes overlapped by half the pad, about an inch per second
- Grits stepped through without skipping
- Surface vacuumed between every grit change
- Stopped at 180 softwood / 220 hardwood before stain
- Finished with light hand passes along the grain
- Detail or sheet sander used for internal corners
- Eye and dust protection on throughout
Final Thoughts
If you own one sander, make it a dual action. It will not strip a deck as fast as a belt sander or reach corners like a detail sander, but it produces the surface that actually matters — the one you put finish on.
Get variable speed if you can, connect a vacuum, and above all stop pressing down. Almost every complaint about these tools traces back to that one habit.
🔧 What to read next: compare the wider category in our best DA sanders guide, or see sanders for furniture for project-specific advice. Plan your grits with the grit progression planner.