How to judge a scratch, fix it at the right level, steam a dent out of solid timber, and know when spot-repairing will look worse than refinishing.
Someone drags a plant pot across your table. There is a pale line across the top and your stomach drops. Before you reach for sandpaper, stop — sanding is usually the wrong first move.
Here is the thing most people do not realise: the great majority of scratches on finished furniture are in the finish layer, not the wood beneath. The pale line you can see is light scattering off the damaged varnish, not exposed timber. Those scratches often disappear completely with a five-minute treatment and no abrasive at all.
So the first job is not repair. It is diagnosis — working out how deep the damage actually goes, because that decides everything you do next. ✅
Alt text: “Fingernail testing the depth of a scratch across a wooden tabletop under raking light”
- Diagnose before you repair
- The three levels of damage
- Fixing surface scratches
- Fixing scratches through the finish
- Fixing deep gouges
- Dents are different — steam them out
- Water rings and heat marks
- When to refinish the whole surface
- Spot sanding without making it obvious
- Common mistakes (and how to fix them)
- Pro tips worth knowing
- The repair kit I recommend
- Frequently asked questions
- Your final checklist
Diagnose Before You Repair
Two simple tests tell you almost everything.
The fingernail test
Run your fingernail lightly across the scratch, at right angles to it.
- Your nail glides over it — the scratch is in the finish only. Easy fix.
- Your nail catches slightly — it has gone through the finish, possibly into the wood surface. Moderate fix.
- Your nail drops into it — a genuine gouge in the timber. Bigger job.
The damp cloth test
Wipe the scratch with a barely damp cloth, or a little mineral spirits.
- It disappears while wet and returns when dry — the damage is in the finish. The liquid is temporarily filling the scratch and letting light pass normally. This is genuinely good news.
- It stays visible when wet — the wood itself is damaged or the colour has been removed.
If a scratch vanishes under a damp cloth, you almost never need sandpaper. You need something that fills or re-melts the finish.
Do both tests under raking light — a lamp held low so light skims across the surface. It shows the true extent of the damage, and often reveals other marks you had not noticed, which matters when deciding between spot repair and refinishing.
The Three Levels of Damage
| Level | How to tell | Fix | Difficulty |
|---|---|---|---|
| 1. In the finish only | Nail glides over; vanishes when damp | Polish, wax stick, or finish reviver | ✅ Easy |
| 2. Through the finish | Nail catches; colour looks lighter | Touch-up marker, then blend and seal | Moderate |
| 3. Gouged into the wood | Nail drops in; you can see depth | Wax filler or wood filler, then finish | ⚠️ Harder |
| Dent (no fibres cut) | Smooth depression, no sharp edges | ✅ Steam it out — often disappears | Easy but satisfying |
One important distinction: a dent is compressed wood, where the fibres have been crushed but not cut. A gouge is removed wood. Dents can often be raised back out with steam and look perfect afterwards. Gouges cannot — the material is gone and has to be filled.
Fixing Surface Scratches
These are the most common and the most satisfying, because they usually vanish entirely.
Option 1 — Furniture polish or paste wax
The simplest first attempt. Wax fills the microscopic groove so light stops scattering off its edges. Apply, let it haze, buff off with a clean cloth. It is not permanent — it wears away over months — but it takes two minutes and often works completely.
Option 2 — A finish reviver
Products designed to soften and re-flow the existing finish rather than coat over it. They work particularly well on older lacquer and shellac finishes, and can make a whole tabletop of fine scratches disappear at once. Test in a hidden area first, since they can affect some modern finishes differently.
Option 3 — Wax repair sticks
Coloured wax crayons. Rub across the scratch so wax packs into it, then scrape the excess off flush with a plastic card and buff. Good for scratches that catch slightly. Match the colour a shade lighter than the wood if you cannot match exactly, since a dark line reads as damage while a light one reads as grain.
Option 4 — Buffing with a very fine abrasive
On a gloss finish with fine scratches, a non-woven abrasive pad or automotive polishing compound can level the finish slightly and restore clarity. Work with the grain, use very light pressure, and expect the sheen to change — you may need to buff the whole panel to keep it even.
Fixing Scratches Through the Finish
Here the finish is breached and the wood beneath has lost its colour — that is why the line looks pale.
- Clean the area. Remove wax and polish with mineral spirits so your repair materials bond properly.
- Restore the colour. Use a touch-up marker, a stain pen, or a small amount of matching stain on a fine brush. Apply into the scratch, not across the surrounding surface.
- Wipe the excess immediately from the surrounding finish with a clean cloth, before it dries. Colour left on the intact finish is what makes repairs look like repairs.
- Build up in thin layers. Two light applications beat one heavy one. Let each dry.
- Seal it. A dab of matching finish — wipe-on poly, shellac or lacquer — over the repair protects it and evens the sheen.
- Blend the sheen. If the repaired spot is glossier or duller than the rest, adjust with a fine abrasive pad for less gloss, or another thin coat for more.
Colour matching is the hard part. Test on a hidden area first — the underside, the back, inside a drawer. Wood colour also shifts with age, so a “matching” stain from the original tin will often be too light for a piece that has darkened over years. Build up gradually and stop slightly light rather than overshooting; a too-dark repair is far more obvious.
Fixing Deep Gouges
Your nail drops in and you can see actual depth. Wood is missing, so something has to replace it.
Wax or shellac burn-in sticks
Hard wax filler sticks in wood tones. Melt slightly and press into the gouge, overfilling a little, then scrape flush with a plastic card once cool. Shellac burn-in sticks are the professional version — melted with a heated knife, they give a harder, more durable repair that takes finish well.
Advantage: no sanding of the surrounding area, so you do not disturb the existing finish. Limitation: wax will not take stain and is not structural.
Wood filler
Better for larger damage. Choose a stainable filler if the piece will be stained, and be aware that even “stainable” fillers rarely take colour identically to the surrounding wood. Overfill slightly, let it cure fully, then sand flush at 180 and blend outward.
For a better colour match, mix fine sanding dust from the same piece with a little clear glue or finish to make your own filler. It matches far more convincingly than anything from a tube.
Cutting in a patch
For serious damage on a valuable piece, a professional cuts out the damaged area and inlays matching timber with the grain aligned. It is skilled work, but on an antique it is often the only invisible repair.
Dents Are Different — Steam Them Out
This is the most satisfying repair in woodworking, and most people have never heard of it.
A dent is compressed wood. The fibres are squashed but still there and still intact. Add moisture and heat and those fibres swell back to their original shape — the dent genuinely lifts out.
How to do it:
- Remove the finish over the dent if there is one, using a very light sand at 220. Moisture cannot reach the wood through varnish.
- Put a few drops of water on the dent and let it soak in for a minute or two.
- Lay a damp cotton cloth over the dent, folded a few times.
- Press a hot iron onto the cloth for a few seconds at a time, moving it slightly. You should hear it steam. Do not leave it in one place.
- Check progress every few seconds. Repeat until the dent has risen.
- Let it dry completely, then sand lightly at 220 and refinish that area.
This only works on dents, not gouges. If the fibres have been cut or torn out, there is nothing to swell back. And it works far better on solid timber than veneer, where too much moisture can lift the glue.
Water Rings and Heat Marks
Not scratches, but the same diagnostic thinking applies — and they are extremely common.
White or cloudy rings mean moisture is trapped in the finish, not in the wood. This is good news: the wood is undamaged. Try these in order:
- Rub gently with a soft cloth and a little furniture polish or petroleum jelly, left on for a few hours.
- Try the iron method — dry iron on low, over a folded dry cotton cloth, a few seconds at a time, checking constantly. The gentle heat drives the trapped moisture out.
- Some people use a hairdryer on low held a few inches away, moving constantly. Slower but lower risk.
- If those fail, a finish reviver or a very light buff with an abrasive pad may clear it.
Dark or black rings are different and worse. The moisture has passed through the finish and into the wood, often reacting with tannins to form dark staining. These usually require stripping that area and treating with oxalic acid wood bleach — and often refinishing the whole surface afterwards.
When to Refinish the Whole Surface
Sometimes the honest answer is that a spot repair will look worse than starting over. Refinish the whole panel when:
- The surface is high gloss. Gloss shows every variation in sheen, and blending a repair into gloss is genuinely difficult.
- There are multiple scratches across the surface. Ten small repairs read as damage; one even refinish reads as a nice table.
- The damage is in the middle of a large flat area with no grain feature or joint to hide the transition.
- The existing finish is failing anyway — cloudy, flaking or worn through in places.
- You have tried a spot repair and it shows. Chasing it usually makes it worse.
Refinishing a single surface — just the tabletop, not the legs and frame — is often a very reasonable middle path. Our guides to sanding furniture before staining and removing old finish cover that process.
Spot Sanding Without Making It Obvious
If you do need to sand a repair, technique decides whether it disappears or announces itself.
- Feather outward. Never sand a hard-edged patch. Work in a wide oval, sanding hardest in the centre and progressively lighter towards the edges, so there is no step where repair meets original.
- Always sand with the grain. Cross-grain scratches will show under the new finish.
- Use a block on flat areas so you do not dish the repair.
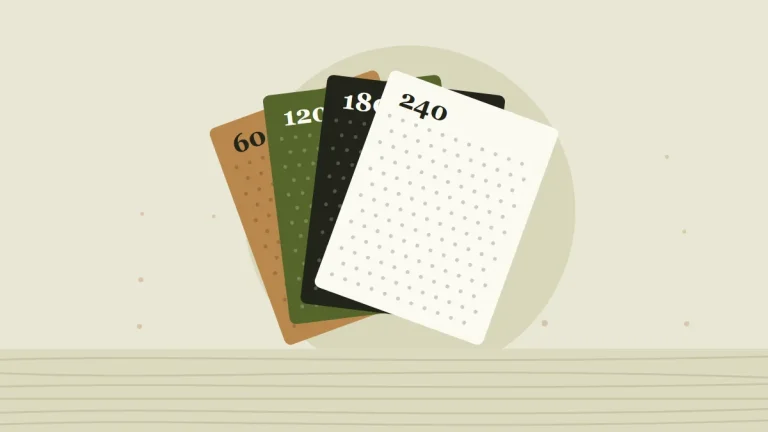
- Do not skip grits. 180 then 220 for most repairs.
- Check with mineral spirits before finishing. It previews exactly how the repair will look under a coat.
- Match the sheen last. Gloss level is what gives repairs away more than colour. Adjust with an abrasive pad to reduce shine, or another thin coat to increase it.
Our grit chart covers the sequence in more detail.
Common Mistakes (and How to Fix Them)
Mistake 1 — Reaching for sandpaper first
What happens: you cut through good finish to fix damage that a wax stick would have hidden.
The fix: do the fingernail and damp cloth tests before anything else.
Mistake 2 — Sanding a hard-edged patch
What happens: a visible halo where the repair meets the original surface.
The fix: feather outward in a wide oval, lightest at the edges.
Mistake 3 — Going too dark with colour
What happens: the repair reads as a dark line, which is more obvious than a pale one.
The fix: build up in thin layers and stop slightly light.
Mistake 4 — Ignoring the sheen
What happens: the colour matches perfectly and the repair still shows because it is glossier than the rest.
The fix: adjust with an abrasive pad or another thin coat until it matches.
Mistake 5 — Steaming a gouge
What happens: nothing, because the fibres are gone rather than compressed.
The fix: steam dents, fill gouges. Learn to tell them apart.
Mistake 6 — Steaming veneer aggressively
What happens: moisture reaches the glue line and the veneer bubbles or lifts.
The fix: use minimal moisture and short bursts on veneer, or skip the method entirely.
Mistake 7 — Not testing colour in a hidden spot
What happens: a permanent mismatch in the middle of the visible surface.
The fix: test on the underside or inside a drawer first, every time.
Mistake 8 — Chasing a repair that will not blend
What happens: each attempt makes the area larger and more obvious.
The fix: recognise when refinishing the whole surface is the better answer.
Pro Tips Worth Knowing
Always work under raking light
A lamp held low shows the damage, shows your progress, and shows whether the repair is blending. Overhead light hides everything until it is too late.
Make filler from the wood itself
Fine sanding dust from the same piece, mixed with a little clear glue or finish, matches better than anything commercial.
Start with the least invasive method
Polish before wax, wax before colour, colour before filler, filler before sanding, sanding before refinishing. You can always escalate; you cannot un-sand.
Repair in daylight, check at night
Different light sources reveal different mismatches. A repair that vanishes in daylight can glow under a lamp.
Keep the offcuts
If you build something, keep a scrap. It is the perfect test piece for any future repair, already the same species and age.
The Repair Kit I Recommend
For the everyday scratches that appear on furniture, floors and trim, a combined marker-and-wax kit covers almost everything without committing you to refinishing.
REALINN Wood Furniture Repair Kit, 28 Pieces
Best for Everyday ScratchesThis is the kit to reach for when the fingernail test says the scratch has gone through the finish but not deep into the wood — by far the most common kind of damage. It combines touch-up markers for restoring colour with wax filler sticks for scratches that catch slightly, which covers the two most useful repair levels in one box.
The practical advantage is the range of wood tones. Colour matching is the hard part of any repair, and having multiple shades lets you blend two together to get closer than a single “oak” pen ever will. Wax repairs are also reversible and non-invasive — if the match is wrong, you scrape it off and try again, which is not true of stain or filler.
Why it works:
- ✅ Covers the two most common repair levels — colour loss and shallow scratches — in one kit
- ✅ Multiple tones let you blend towards a match instead of settling for the closest single pen
- ✅ Wax is reversible — scrape it out and retry if the colour is off
- ✅ No sanding or refinishing required, so you do not disturb the surrounding finish
- ✅ Works on floors, skirting and doors too, not just furniture
- ⚠️ Not a structural repair. Deep gouges still need proper filler or a professional patch
- ⚠️ Test on a hidden area first. Wood darkens with age, so the “matching” tone is often a shade or two out
- ⚠️ Seal the repair afterwards on surfaces that get handled, or the wax will wear away
Best for: scratches on dining tables, chair legs, skirting boards, laminate and wood floors, doors, and any everyday knock that has broken the finish.
Not for: deep gouges, damage on high-gloss surfaces where sheen mismatch will show, or pieces where the whole finish is failing — refinish those instead.
Check price on Amazon (opens Amazon in a new tab)Prices and availability change often — check Amazon for the current price.
Frequently Asked Questions
How do I know if a scratch is in the finish or the wood?
Two quick tests. Run a fingernail across it — if your nail glides over, the damage is in the finish; if it catches or drops in, it has reached the wood. Then wipe it with a damp cloth: if the scratch vanishes while wet and reappears as it dries, the wood underneath is undamaged and you are looking at a finish repair, which is far easier. Do both under a low raking light.
Can you sand out a scratch in wood?
You can, but it is usually the last resort rather than the first. Sanding removes the surrounding finish as well as the scratch, so you then have to refinish that area and blend the sheen — which is often more visible than the original mark. Try polish, wax sticks or a touch-up marker first. If you do sand, feather outward in a wide oval, work with the grain, and expect to refinish the whole surface for the most even result.
Does the iron and damp cloth trick really work?
Yes — for dents, not gouges. A dent is compressed wood where the fibres are squashed but intact, and steam makes them swell back to shape. Sand off the finish over the dent, add a few drops of water, cover with a damp cloth, and press a hot iron on in short bursts, checking often. It genuinely works, and on solid softwood a deep dent can disappear almost completely. It will do nothing for a gouge, where the wood has been cut away.
How do I get rid of a white ring on my table?
White or cloudy rings are moisture trapped in the finish, not damage to the wood — which means they are usually fixable. Try furniture polish or a little petroleum jelly rubbed in and left for a few hours. If that fails, use a dry iron on low over a folded dry cotton cloth in short bursts, checking constantly, to drive the moisture out. Dark or black rings are different: the moisture has reached the wood, and those normally need stripping and oxalic acid bleach.
Should I repair the scratch or refinish the whole top?
Refinish the whole surface if the finish is high gloss, if there are several scratches rather than one, if the damage sits in the middle of a large open area with nothing to hide the transition, or if the existing finish is failing anyway. Spot repairs work best on satin and matt finishes, on smaller marks, and near grain features or edges where the eye is already busy. If a spot repair has already failed once, refinishing is usually quicker than chasing it.
How do I match the colour of a repair?
Build up gradually and test somewhere hidden first — the underside, the back, inside a drawer. Wood darkens with age, so even the original stain will often be too light for a piece that has been in daylight for years. Blend two tones if you have them rather than accepting the nearest single match. And stop slightly lighter than the surrounding wood: a pale repair reads as natural grain variation, while a dark one reads unmistakably as damage.
Your Final Checklist
- Damage inspected under a low raking light
- Fingernail test done to judge depth
- Damp cloth test done to see if it is finish-only
- Dent and gouge distinguished before choosing a method
- Area cleaned of wax and polish with mineral spirits
- Least invasive method tried first — polish, then wax, then colour
- Colour tested in a hidden area before use
- Colour built up in thin layers, stopping slightly light
- Excess wiped off the surrounding finish immediately
- Dents steamed with a damp cloth and iron, in short bursts
- Extra care taken with veneer and moisture
- Any sanding feathered outward in a wide oval, with the grain
- Repair previewed with mineral spirits before finishing
- Repair sealed with a matching finish
- Sheen matched — the thing that gives repairs away
- Result checked in both daylight and lamplight
- Whole-surface refinish chosen where blending was never going to work
Related reading: sanding furniture before staining, the complete sandpaper grit chart, and how to use a detail sander.