Forget the forge — most of a blade’s shape comes off a belt grinder. Here is what to buy first, and what to buy when you are serious.
⚡ The Short Answer
Start with a 1″ x 30″ belt grinder. It is the standard entry point for knife making: cheap to buy, cheap to feed, and belts are available in every abrasive type from coarse ceramic to fine finishing. It will take you from a blank to a finished blade.
The serious answer is a 2″ x 72″. That is the professional standard — wider belts, far more power, variable speed, and a huge choice of abrasives. It is also several times the price, and worth it only once you know you will keep making knives.
What matters more than either: variable speed and a flat platen. Heat is what ruins blade steel, and speed control is how you avoid it.
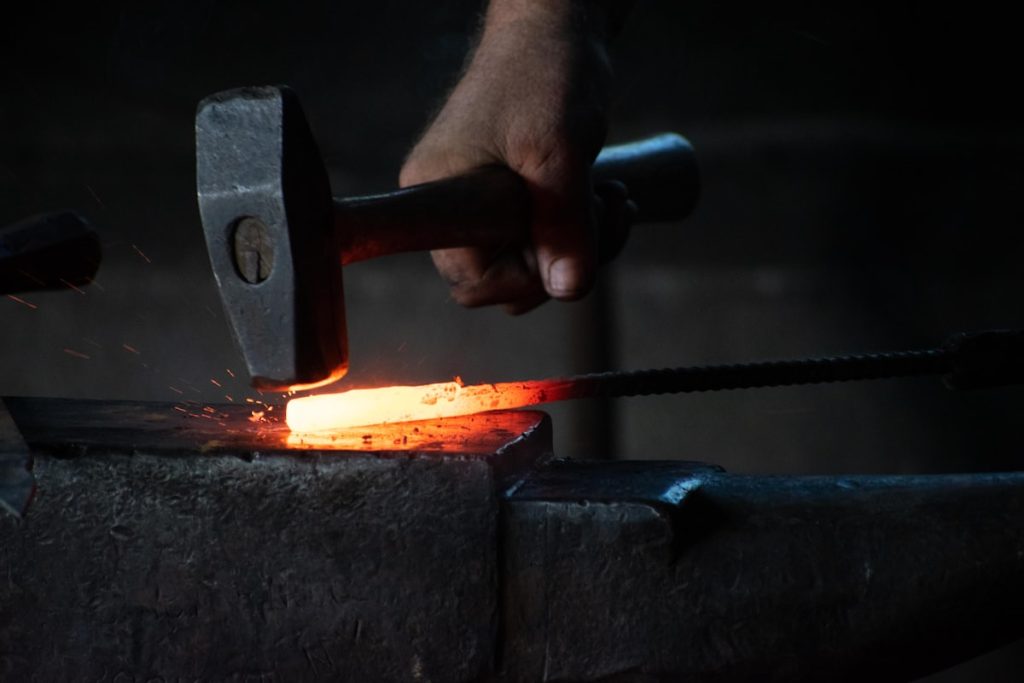
The single biggest surprise for new knife makers is how much of the work is grinding, not forging. Even in stock removal — where you start with a flat bar and simply grind a knife out of it — the belt grinder does essentially all of the shaping, bevelling and finishing.
That makes the grinder the tool worth thinking about carefully. This guide covers the sizes, what actually matters in a machine, how to avoid destroying your heat treatment, and the honest truth about where the cheap options stop being enough.
1×30, 2×42 and 2×72 Explained
Belt grinders are described by belt width x length, and the size determines far more than how fast you can remove steel.
| Size | Position | Strengths | Limits |
|---|---|---|---|
| 1″ x 30″ | Entry level | Cheap machine, very cheap belts, huge availability | Low power, belts wear fast, limited platen |
| 2″ x 42″ | Mid range | More power, wider belt, better for larger blades | Fewer abrasive options than 2×72 |
| 2″ x 72″ | Professional standard | Power, variable speed, every abrasive made, attachments | Significantly more expensive |
| 4″ x 36″ combo | Woodworking crossover | Doubles as a wood sander with disc | Usually single speed — poor for steel |
The 1″ x 30″ is where nearly everyone starts, and it is a genuinely sensible starting point. A long belt run means the abrasive lasts longer than the size suggests, the narrow belt is good for plunge lines and tight curves, and if you decide knife making is not for you, you have lost very little.
The 2″ x 72″ is what every experienced maker eventually buys. The reason is not just power — it is the ecosystem. Every abrasive type, grit and backing is made in that size, along with small wheel attachments, work rests and rotary platens. If you are certain you will keep making knives, buying one early saves buying twice.
🔪 The honest advice: buy the 1×30 to find out whether you love this. Buy the 2×72 once you know you do.
What Actually Matters in a Grinder
- Variable speed. The most important feature for blade work by a wide margin. Slow speeds keep steel cool during finishing and let you work carefully near an edge; fast speeds hog material off a blank. A single-speed machine forces you to manage heat entirely by quenching.
- A flat platen. The steel plate behind the belt is what gives you a flat grind. If it is not truly flat, or it flexes, your bevels will be uneven. Many makers upgrade the platen or add a glass or ceramic facing.
- Motor power. More power means the belt keeps moving under pressure instead of slowing. A bogging belt generates heat without removing steel — the worst combination.
- Belt tracking. The belt must run centred and stay there. Poor tracking is the most common frustration on budget machines, and it is usually adjustable rather than a fault.
- A work rest. A solid, square rest makes repeatable bevels far easier. Freehand grinding is a skill worth learning, but a rest shortens the learning curve.
- Exposed contact wheel. The rounded wheel at the end lets you grind hollow bevels and inside curves. A machine that exposes it is far more versatile.
Notice that belt speed and flatness come above raw power. A powerful machine that cannot run slowly will overheat thin steel, and a machine with a bowed platen cannot produce a clean flat grind at any speed.
Our Pick to Start With
WEN Benchtop Belt and Disc Sander, 1″ x 30″
Best Entry Point★★★★★ 4.6 out of 5 — the standard starting machine
The 1″ x 30″ format is where most knife makers begin, and this is the common choice. The narrow belt is genuinely well suited to blade work — it handles plunge lines, tight curves and the ricasso far better than a wide belt, and the exposed roller lets you grind inside curves. The included disc is useful for squaring tangs and flattening scales.
- ✅ Cheapest belts of any grinder size — you can afford to change grit properly
- ✅ Narrow belt suits blade geometry — plunges, curves and tight radii
- ✅ Disc squares tangs and flattens handle scales
- ✅ Low entry cost — a sensible way to find out if you enjoy the craft
- ⚠️ Single speed — you must manage heat by quenching frequently
- ⚠️ Limited power for heavy stock removal on thick blanks
- ⚠️ Best for: beginners, small blades, sharpening, hobby use
Price and availability change often — the button shows the live Amazon price.
ℹ️ On 2″ x 72″ machines: these are the professional standard, but they are a different class of purchase — typically several times the price, often sold as a frame that you specify a motor and variable frequency drive for. We are not linking a specific model here because the right configuration depends heavily on your motor choice and budget. If you are ready for one, research the frame and drive combination rather than buying the cheapest complete unit.
Comparison
| Machine | Belt | Variable speed | Best for |
|---|---|---|---|
| WEN 1″ x 30″ | 1″ x 30″ | ❌ No | Starting out, small blades, sharpening |
| VEVOR 4″ x 36″ + disc | 4″ x 36″ | ❌ No | Wood crossover, flattening scales |
| 2″ x 72″ (various) | 2″ x 72″ | ✅ Usually | Serious knife making |
💬 Affiliate disclosure: as an Amazon Associate, DetailSanderGuide may earn from qualifying purchases. This costs you nothing extra and never changes which tools we recommend.
Belts — The Part That Matters Most
New makers spend a long time choosing a machine and almost no time choosing belts. That is backwards. A cheap grinder with good ceramic belts outperforms an expensive one with worn aluminium oxide every time.
| Abrasive | Best for | Notes |
|---|---|---|
| Ceramic | Hogging steel, primary bevels | Cuts fast and cool; the workhorse for blade work |
| Zirconia | General shaping | Good middle ground, cheaper than ceramic |
| Aluminium oxide | Wood, handle scales, light work | Dulls quickly on hardened steel |
| Silicon carbide | Finishing, hand-sanding prep | Fine finishes, breaks down quickly |
| Structured abrasive | Final finish and satin lines | Consistent scratch pattern |
Use fresh belts. This is the single most common beginner mistake. A worn belt does not cut — it rubs, and rubbing generates heat, and heat is what destroys blade steel. Belts are consumables, and treating them as precious costs you far more in ruined blades than the belts would have cost.
A sensible starting set: 36 or 60 grit ceramic for shaping, 120 grit for refining, and 220 to 400 for pre-finish. Then hand sand from there if you want a mirror or satin finish.
Heat: The Thing That Ruins Blades
This is the part that separates knives that hold an edge from knives that do not.
Blade steel is heat treated to a specific hardness. If you let the steel get too hot while grinding, you draw the temper — the hardness comes back out of it — and the edge will never hold properly again. Worse, the damage is invisible until you use the knife.
The visible warning is colour. If you see the steel turn straw, brown, purple or blue, you have overheated it. Blue is far too late. On a thin edge, this can happen in seconds.
How to keep the steel cool:
- Keep a container of water beside the grinder and quench frequently — every few passes, not when it feels warm.
- Use fresh, sharp belts. Sharp abrasive cuts and carries heat away in the swarf. Dull abrasive just rubs.
- Slow the belt down if your machine allows it, especially near the edge.
- Grind before heat treatment where possible. Most stock removal makers rough the bevels in soft steel, heat treat, then finish grind carefully.
- Leave the edge thick until after heat treatment. A thin edge overheats almost instantly. Leave it around the thickness of a coin.
- Light pressure. Pushing harder makes heat, not progress.
⚠️ If you can hold it, it is not too hot — but that rule fails on thin edges. The very edge of a blade heats and cools far faster than the spine you are holding. Quench on a schedule rather than by feel, and watch for any colour change in the steel.
Grinding a Bevel
The bevel is the tapered face that runs from the spine down to the edge. Grinding one evenly on both sides is the core skill of knife making, and it takes practice — expect your first few to be wonky.
- Mark your lines first. Scribe a centre line down the edge of the blank and a plunge line where the bevel starts. Layout fluid or a permanent marker makes them visible.
- Grind the edge flat to start. Take the very edge down to a consistent thickness — roughly a coin’s thickness — before you shape anything.
- Use a work rest or a jig at first. Freehand looks impressive but is genuinely hard. A rest gives consistent angles while you learn.
- Count your passes. Whatever you do on one side, do exactly the same on the other. This is the simplest way to keep bevels even.
- Work up through the grits, removing the previous grit’s scratches completely before moving on.
- Check constantly. Look down the edge from the tip. Uneven bevels show up immediately from that angle.
The most common failure is an uneven plunge line — where the bevel starts. Both sides should begin at the same point along the blade. Marking them clearly and grinding with a rest solves most of it.
Common Mistakes and Fixes
1. Overheating the blade
Result: the temper is drawn and the edge will not hold. Invisible until you use it.
Fix: quench often, use fresh belts, slow the speed, leave the edge thick until after heat treat.
2. Using worn belts to save money
Result: heat instead of cutting, plus a poor finish.
Fix: treat belts as consumables. A fresh belt costs less than a ruined blade.
3. Grinding the edge too thin before heat treatment
Result: the thin edge warps or cracks in the quench.
Fix: leave roughly a coin’s thickness at the edge, then finish grind after heat treat.
4. Uneven plunge lines
Result: the knife looks amateur even if it cuts well.
Fix: mark both sides, use a rest, and count passes.
5. Skipping grits
Result: deep 60 grit scratches that take forever to remove at 400.
Fix: step through properly and remove each grit’s scratches fully.
6. Grinding wood and steel on the same machine without cleaning
Result: sparks from steel meeting accumulated wood dust — a genuine fire risk.
Fix: clean the machine and empty any collection between materials.
7. No respiratory protection
Result: inhaling metal dust, which is considerably worse for you than wood dust.
Fix: a proper respirator, not a paper mask.
Safety — Sparks and Steel Dust
Grinding steel is a different safety proposition from sanding wood, and it is worth taking seriously.
- Eye protection is non-negotiable. Grinding throws hot particles directly at face height. Wear proper impact-rated glasses or a face shield.
- Respirator, not a dust mask. Metal dust is fine, sharp and hazardous to inhale. Some alloys are worse than others.
- Fire risk is real. Sparks plus accumulated wood dust, or plus a dust bag full of sanding debris, is a genuine ignition source. Never grind steel on a machine still full of wood dust.
- No gloves near a running belt. This is counter-intuitive, but a glove that catches on a belt pulls your hand in. Most experienced makers grind bare-handed and quench often.
- Tie back hair, remove loose sleeves, and keep the area around the grinder clear.
- Watch the sparks direction. Position the machine so sparks go away from you, and away from anything flammable.
- Ventilate. Metal dust hangs in the air longer than you expect.
General dust precautions are in our dust safety checklist, though metal work needs the extra fire and respiratory considerations above.
Real-World Examples
The first knife that would not hold an edge
Extremely common. The blade looks great, the bevels are even, the finish is clean — and it goes blunt after cutting a few pieces of cardboard. Almost always the cause is heat during finish grinding, usually at the very edge where the steel is thinnest. The maker felt the spine, decided it was cool enough, and kept going. Quenching on a schedule rather than by feel prevents it.
The 1×30 that turned out to be enough
Plenty of makers buy an entry-level grinder expecting to outgrow it in weeks, then produce dozens of good knives on it. With ceramic belts and patience, a 1″ x 30″ is genuinely capable. What it will not do is remove steel quickly, so it suits smaller blades and thinner stock.
The fire in the dust bag
Someone uses a combination sander for woodworking, then grinds a blade on the same machine without emptying it. Sparks land in a bag of fine wood dust. This happens more often than people think, and it is entirely preventable with two minutes of cleaning.
Handle Scales and Finishing
The blade is only half the knife. Handle scales — the pieces of wood, micarta or G10 fixed either side of the tang — are shaped on the same grinder, and this is where the disc earns its place.
Flattening. Scales must sit perfectly flat against the tang or the glue line will show as a visible gap. The disc sander with the table set square is the fastest way to true them.
Shaping. Once the scales are pinned and glued, the whole handle is shaped as a unit on the belt. Work slowly here — it is easy to grind into the tang or thin one side more than the other. Check symmetry by feel with your eyes closed, exactly as you would a feathered edge in bodywork.
Finishing. Natural wood scales usually finish best by hand from around 400 grit upward, then oil. Synthetic materials like micarta and G10 can go much finer on the machine, but they produce dust that is genuinely unpleasant to breathe — a respirator matters more with synthetics than with wood.
One caution: stabilised and resin-based handle materials heat quickly and can melt or scorch. Keep the belt speed low and the pressure light, exactly as you would on a thin blade edge.
Frequently Asked Questions
What size belt grinder is best for knife making?
1″ x 30″ to start — cheap, widely available belts, and well suited to blade curves and plunge lines. 2″ x 72″ is the professional standard, with more power, variable speed and by far the widest choice of abrasives and attachments. The 2×72 is a significantly larger investment, so the usual path is to start with a 1×30 and upgrade once you are sure you will keep making knives.
What belts should I use for knife making?
Ceramic belts for shaping and primary bevels — they cut fast and stay cool, which is exactly what hardened steel needs. Zirconia is a reasonable cheaper alternative. Avoid plain aluminium oxide on hardened steel; it dulls almost immediately. A sensible starting set is 36 or 60 grit ceramic for shaping, 120 for refining, and 220–400 for pre-finish work.
How do I stop overheating the blade while grinding?
Quench in water frequently — every few passes, on a schedule rather than when it feels hot. Use fresh sharp belts, because dull abrasive rubs and generates heat instead of cutting. Slow the belt speed if your machine allows it. Leave the edge roughly a coin’s thickness until after heat treatment, since a thin edge overheats in seconds. If you see straw, brown, purple or blue colours appear in the steel, you have already gone too far.
Can I use a normal belt sander for knife making?
You can start with one, and many people do. A benchtop belt and disc sander will shape a blade, particularly with ceramic belts. The limitations are heat — most are single speed and run fast — and the platen, which may not be flat enough for clean bevels. Do not use a handheld belt sander; you need both hands on the blade. And never grind steel on a machine still loaded with wood dust.
Should I grind bevels before or after heat treatment?
Most stock removal makers rough the bevels in before heat treatment, while the steel is soft and easy to work, leaving the edge thick — around a coin’s thickness. Then they heat treat, then finish grind carefully with plenty of quenching. Grinding everything after heat treat is possible but slower, harder on belts, and much riskier for overheating. Leaving the edge thick before quenching also reduces the chance of warping or cracking.
Knife Grinding Checklist
- Eye protection and respirator on — not a paper dust mask
- Machine cleaned of wood dust before grinding steel
- No gloves, loose sleeves or untied hair near the belt
- Water container beside the grinder for quenching
- Fresh ceramic belts fitted for shaping
- Centre line and plunge lines marked before grinding
- Edge left roughly a coin’s thickness before heat treat
- Quenching on a schedule, not by feel
- Watching for straw, brown or blue colours in the steel
- Equal passes on both sides to keep bevels even
- Grits stepped through without skipping
- Sparks directed away from you and anything flammable
Final Thoughts
The grinder does most of the work in knife making, but the skill is in managing heat rather than removing steel. Fresh belts, frequent quenching and a thick edge until after heat treatment will save more blades than any upgrade.
Start with a 1″ x 30″ machine and good ceramic belts. If you are still making knives a year later, that is when a 2″ x 72″ earns its price.
🔧 What to read next: see benchtop belt sanders for the wider category, and belt sanders compared if you also work with wood.