DEWALT’s palm sanders are workshop staples. Here is which one to buy, and why a square pad still beats a round one for some jobs.
⚡ The Short Answer
A DEWALT palm sander means one of two very different tools. The DWE6411 is a 1/4 sheet sander — square pad, 14,000 OPM, and it gets into internal corners a round sander physically cannot reach. The DWE6423 is a 5″ random orbital — round pad, variable 8,000–12,000 OPM, and it leaves no swirl marks before stain.
Buy the sheet sander for corners, trim, window frames, cabinets and small flat work. Buy the random orbital for tabletops, doors, furniture and anything that will be stained or varnished.
If you can only own one, the random orbital is the better all-rounder — but the sheet sander is cheaper and solves a problem the orbital cannot.
“Palm sander” is one of those terms that means different things to different people. Some use it for any small one-handed sander. Others mean specifically a quarter-sheet square sander. Tool shops use it for both.
That matters because the two designs are genuinely different tools with different strengths — and buying the wrong one leads to real frustration. This guide covers both DEWALT options, what each does well, and which suits the work you actually do.
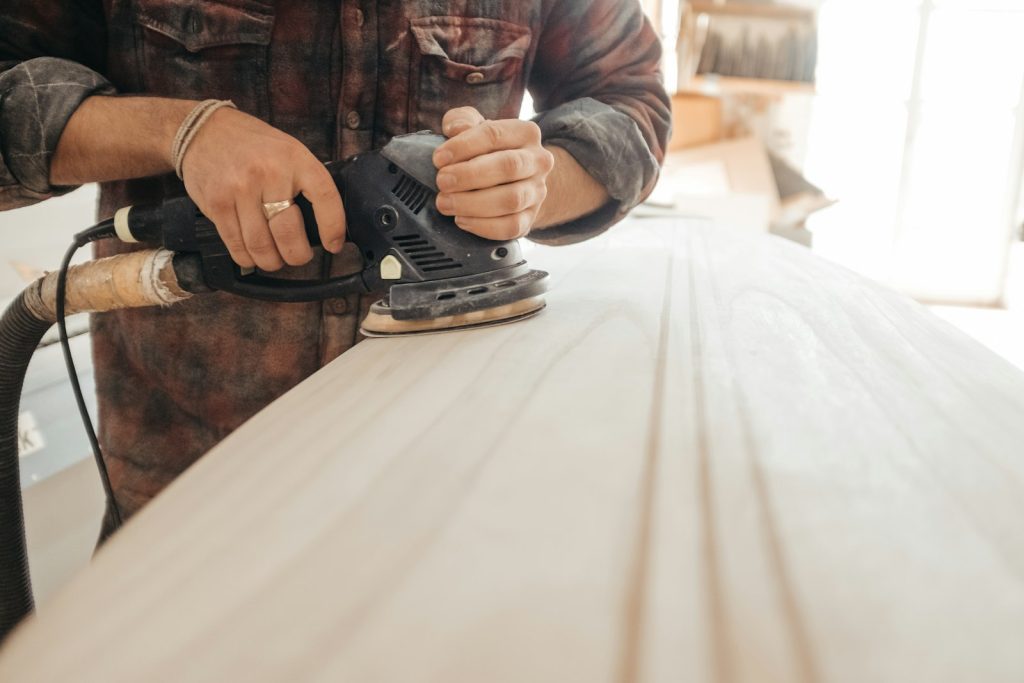
Sheet Sander vs Random Orbital — The Real Difference
The shape of the pad decides almost everything about what the tool can do.
A sheet sander (also called a finishing sander or quarter-sheet sander) has a square or rectangular pad that vibrates in tiny circles. Because the pad has corners, it reaches right into the internal angle where two surfaces meet — the inside of a cabinet, the corner of a window frame, where a skirting board meets the floor.
A random orbital sander has a round pad that spins and orbits at once. That dual motion means the scratch pattern is random, so it leaves no visible swirls under stain. But a circle cannot fit into a right-angled corner, and it never will.
| Feature | ◼ Sheet sander (DWE6411) | ⭕ Random orbital (DWE6423) |
|---|---|---|
| Pad shape | Square, 1/4 sheet | Round, 5 inch |
| Reaches corners | ✅ Yes — its main advantage | ❌ No |
| Swirl-free finish | Good, faint straight pattern | ✅ Excellent, random pattern |
| Removal speed | Slower | Faster |
| Paper cost | Very cheap — cut your own sheets | Pre-cut discs, more expensive |
| Best for | Trim, frames, cabinets, small flat work | Tabletops, doors, furniture, pre-stain |
| Speed | 14,000 OPM fixed | 8,000–12,000 OPM variable |
Most serious woodworkers own both, and they cost little enough that this is realistic. If you are choosing one, ask whether your work has internal corners. Cabinets, panelled doors, window frames and skirting all do. Tabletops, worktops and flat panels do not.
🪵 The honest rule: round pads finish better, square pads reach further. Neither one replaces the other.
Specs That Matter
- Orbits per minute (OPM) — how fast the pad vibrates. Higher is faster but not automatically better; control matters more on delicate work.
- Variable speed — genuinely useful on veneer, thin panels and between coats of finish. Less critical on a sheet sander used for general prep.
- Paper attachment — clamps let you cut cheap sheets to size; hook-and-loop changes in seconds but costs more per sheet. Some sanders offer both.
- Dust extraction — a vacuum port keeps abrasive cutting rather than clogging, and keeps fine dust out of your lungs.
- Grip and balance — you will hold this for long stretches. Rubber overmoulding makes a real difference to fatigue.
- Weight — lighter is better for vertical and overhead work like door frames and cabinet interiors.
✅ Sheet sanders are cheap to feed. You can buy full sheets of sandpaper and cut them into quarters yourself, which costs a fraction of pre-cut hook-and-loop discs. Over a big project that difference adds up.
Our Picks
Selected on published specifications and owner ratings rather than hands-on testing.
DEWALT Electric Sander, 1/4 Sheet, 14,000 OPM (DWE6411)
Best for Corners★★★★★ 4.8 out of 5 — workshop staple
This is the classic quarter-sheet palm sander, and it earns its 4.8 rating by being simple and doing one thing very well. The square pad reaches into internal corners that a round sander cannot touch — cabinet interiors, window frames, panelled doors, where skirting meets the floor. At 14,000 OPM it leaves a fine finish, and the rubber overmould keeps it comfortable through long sessions.
- ✅ Square pad reaches corners — the reason to own one
- ✅ Very cheap to run — cut your own sheets from full sheets of paper
- ✅ 14,000 OPM gives a fine finish on trim and frames
- ✅ Comfortable grip for extended detail work
- ⚠️ Slower material removal than a random orbital
- ⚠️ Fixed speed — no slow setting for veneer
- ⚠️ Best for: trim, cabinets, window frames, small flat work, corners
Price and availability change often — the button shows the live Amazon price.
DEWALT Random Orbit Sander, Variable Speed, 5-Inch (DWE6423)
Best All-Rounder★★★★★ 4.7 out of 5 — the versatile choice
If you are only buying one DEWALT sander, this is it. The round pad will not reach corners, but variable speed from 8,000 to 12,000 OPM and the random orbit action make it far more capable everywhere else — faster removal, and a swirl-free surface that takes stain evenly. The counterweight noticeably reduces vibration on long sessions.
- ✅ No swirl marks — essential before stain or varnish
- ✅ Variable speed for veneer, finish coats and stripping alike
- ✅ Faster removal than a sheet sander
- ✅ Counterweight keeps hands comfortable on big surfaces
- ⚠️ Cannot reach internal corners — that is physics, not a fault
- ⚠️ Best for: tabletops, doors, furniture, anything being stained
Price and availability change often — the button shows the live Amazon price.
Comparison
| Model | Pad | Speed | Variable | Corners | Best for |
|---|---|---|---|---|---|
| DEWALT DWE6411 | 1/4 sheet | 14,000 OPM | ❌ No | ✅ Yes | Trim, frames, cabinets |
| DEWALT DWE6423 | 5″ round | 8,000–12,000 | ✅ Yes | ❌ No | Furniture, pre-stain work |
| Makita BO5030K | 5″ round | 12,000 fixed | ❌ No | ❌ No | Simple reliable alternative |
| Makita XOB01Z | 5″ round | 7,000–11,000 | ✅ 3 speeds | ❌ No | Cordless work |
💬 Affiliate disclosure: as an Amazon Associate, DetailSanderGuide may earn from qualifying purchases. This costs you nothing extra and never changes which tools we recommend.
Sandpaper: Clamps vs Hook-and-Loop
This is a bigger practical difference than most buyers expect, because it decides your running costs.
Clamp-style sheet sanders hold a piece of ordinary sandpaper under spring clamps at each end. You buy full sheets, cut them into quarters, and clamp them on. The paper costs a fraction of pre-cut discs, and you can use any brand or grit you like. The downsides are that fitting takes a little longer, and the paper can loosen mid-job if the clamps are not tight.
Hook-and-loop (velcro) pads take pre-cut sheets or discs that press straight on. Changing grit takes about two seconds, which genuinely encourages you to step through grits properly instead of cutting corners. They cost more per sheet, and the hooks eventually wear out — though replacement pads are inexpensive.
For a big project where you will use dozens of sheets, clamps save real money. For quick jobs and frequent grit changes, hook-and-loop wins on convenience. Many sheet sanders, including the DWE6411, support punched paper for dust extraction — worth using, because it lets the dust escape through the pad rather than clogging the abrasive.
Grit Sequence
| Grit | Use it for | Notes |
|---|---|---|
| 80 | Stripping old paint or varnish, levelling rough patches | Aggressive for a palm sander — expect it to take time |
| 120 | General smoothing and prep | The everyday starting point on most trim |
| 150–180 | Final prep on softwood, before painting | Where most painted projects should stop |
| 220 | Hardwood before stain or oil | Do not go finer before staining |
| 320+ | Light keying between coats of varnish | Very light pressure only |
Palm sanders are finishing tools, not stripping tools. If you are removing a thick old coating over a large area, a random orbital or a heat gun and scraper will get you there far faster, and you can switch to the palm sander for the corners and final passes.
How to Use a Palm Sander Properly
- Fit the paper tightly. On a clamp sander, loose paper flaps, tears and sands unevenly. Pull it taut and check both clamps are gripping the full width.
- Punch the dust holes. If your sander has extraction, use the punch plate to make holes in the paper that line up with the pad. Skipping this is why people think the dust collection does not work.
- Start the tool on the surface. Unlike a belt sander, a palm sander is gentle enough to start in contact. Just keep it flat.
- Let it float. The tool’s weight is the correct pressure. Pressing down slows the orbit, clogs the paper and burnishes the wood instead of cutting it.
- Move slowly and overlap. Roughly an inch per second, overlapping each pass by about half. These are not fast tools — rushing shows.
- Work with the grain for the final passes, especially on visible surfaces.
- Use the corner deliberately. The whole point of a square pad is the front corners. Angle the tool so the corner does the work in tight spots.
The most common misuse is treating a palm sander as a stripping tool. It is a finishing tool. Give it a surface that is already close, and it will make it excellent. Give it a thickly painted door and it will take an afternoon.
Common Mistakes and Fixes
1. Pressing down to speed it up
Result: the pad slows, the paper clogs, the wood burnishes and goes shiny instead of smooth.
Fix: let it float and use a coarser grit if you need faster removal.
2. Not punching dust holes in the paper
Result: dust extraction does nothing and the paper clogs in minutes.
Fix: use the punch plate that came with the sander, or buy pre-punched sheets.
3. Loose paper
Result: torn sheets, uneven sanding, wasted paper.
Fix: tension it properly at both clamps and re-check after a few minutes.
4. Using it to strip a whole door
Result: hours of work and a pile of clogged paper.
Fix: strip with a random orbital, heat gun or chemical stripper, then use the palm sander for corners and finishing.
5. Sanding across the grain on show surfaces
Result: cross-grain scratches that appear the moment stain goes on.
Fix: finish with the grain, and hand-sand the last pass on visible faces.
6. Sanding softwood too fine before painting
Result: a surface too smooth for primer to key into properly.
Fix: stop at 150–180 for painted work.
7. No dust protection
Result: fine dust straight into your face, especially on overhead trim.
Fix: mask and eye protection, plus extraction. See the dust safety checklist.
⚠️ Old paint on trim and window frames. Skirting, architrave and window frames in homes built before roughly 1978 are prime candidates for lead paint, and these are exactly the surfaces a palm sander is used on. Test before sanding. If lead is present, use chemical stripper or a HEPA-shrouded system rather than dry sanding.
Pro Tips
- Cut your own sheets. A full sheet of sandpaper cuts into exactly four quarter-sheets. Buying full sheets and cutting them is far cheaper than pre-cut packs.
- Keep a spare pad. On hook-and-loop models the hooks wear out long before the tool does. A replacement pad makes an old sander feel new.
- Use a sanding block for the very last pass. On visible trim, a couple of hand strokes with the grain removes any residual machine pattern.
- Wrap paper round a block for profiles. Moulded trim and beading need a shaped block or a sanding sponge — no flat sander follows a profile.
- Vacuum, do not just bag. Connecting a shop vacuum roughly doubles paper life and dramatically cuts airborne dust.
- Mark progress with pencil. Light scribbles vanish as you sand evenly, showing exactly where you have and have not covered.
- Do not chase a dent with the sander. Sanding down to a dent removes far more wood than filling it. Fill, then sand flush.
Real-World Examples
The kitchen cabinets that took two tools
A typical repaint job: someone buys a random orbital, sands all the flat door faces beautifully, then discovers the recessed panel corners and the inside edges of the frames are untouched. No amount of extra passes fixes it — a round pad simply cannot enter a square corner. A cheap quarter-sheet sander finishes the job in an hour.
The window frames that were stripped the hard way
Someone tries to strip five layers of old gloss from window frames with a palm sander and 80 grit. The paper clogs within a minute, over and over. Paint softens and gums under friction, so it loads the abrasive rather than being cut. A heat gun and scraper removes the bulk far faster, leaving the sander to do what it is good at — the final smooth.
The pine shelves that went shiny
Pressing hard on softwood with fine paper burnishes rather than cuts — the surface goes slightly glossy and then refuses to take stain evenly. Backing off the pressure and dropping to a coarser grit fixes it, but only if you catch it before the stain goes on.
Maintenance and Getting Longer Life
Palm sanders are simple machines, and most failures come down to neglect rather than wear.
- Clear the dust port regularly. Fine dust packs into the extraction channel and quietly kills suction. Poke it clear and the collection works like new again.
- Check the pad surface. On hook-and-loop models the hooks flatten with use, and paper starts flying off mid-job. A replacement pad is inexpensive and makes an old sander feel new. On clamp models, check the clamp springs still hold tension.
- Inspect the backing foam. The cushion behind the pad compresses over time. When it hardens or wears unevenly, the sander stops sitting flat and starts leaving marks at one edge.
- Blow out the motor vents. Sanding dust is fine enough to clog cooling vents, and a hot motor has a short life. A quick blast of compressed air after dusty jobs is enough.
- Store it with the pad protected. Leaving a sander face-down on a gritty bench embeds particles in the pad, which then scratch your next workpiece.
- Do not force a stalling motor. If the pad slows under normal pressure, the paper is clogged or the bearings need attention — pushing harder will not fix either.
Treat the abrasive as the consumable and the tool as permanent. People routinely wear out sanders by trying to make worn paper work harder, which loads the motor and overheats it. Fresh paper is cheaper than a new sander.
Frequently Asked Questions
Is a palm sander the same as an orbital sander?
Not quite, and the confusion causes a lot of bad purchases. A palm sander usually means a quarter-sheet finishing sander with a square pad that vibrates in tiny orbits. A random orbital sander has a round pad that both spins and orbits. The square one reaches corners; the round one leaves no swirl marks and removes material faster. Both are held in one hand, which is why the names get muddled.
Which DEWALT palm sander should I buy?
Buy the DWE6411 quarter-sheet sander if your work involves corners — cabinets, window frames, panelled doors, skirting and trim. Buy the DWE6423 random orbital if your work is flat surfaces that will be stained or varnished, like tabletops and doors. If you can stretch to both, that is what most workshops end up doing, because they genuinely solve different problems.
Can a palm sander remove paint?
It can, but it is usually the wrong tool for the job. Paint softens under friction and clogs the abrasive quickly, so you get through a lot of paper slowly. For large painted areas, use a heat gun and scraper, chemical stripper, or a random orbital with coarse grit, then bring in the palm sander for corners and the final smooth. Always test for lead paint on anything pre-1978 first.
Why does my sandpaper keep clogging?
Three usual causes. You are pressing too hard, which generates heat and melts finish into the abrasive. The dust holes are not punched, so extraction cannot pull dust away. Or the surface still has a soft coating on it that needs stripping another way first. Also check the paper grade — very fine paper clogs faster on resinous softwood.
What grit for sanding before painting?
120 to start, finishing at 150–180 for most painted work. Resist going finer — primer and paint need a slight key to grip, and an over-polished surface can actually reduce adhesion. For bare wood that will be stained rather than painted, go to 180 on softwood or 220 on hardwood and stop there.
Your Palm Sander Checklist
- Paper fitted tight at both clamps, or pressed firmly onto the hook-and-loop pad
- Dust holes punched to line up with the pad
- Shop vacuum connected rather than relying on the bag
- Dust mask and eye protection on
- Pre-1978 trim tested for lead paint before dry sanding
- Correct grit chosen — 120 to start, 150–180 to finish for paint
- Tool kept flat and allowed to float, no downward pressure
- Slow overlapping passes at about an inch per second
- Square corner used deliberately for tight internal angles
- Final passes made with the grain on visible surfaces
- Shaped block or sponge used on mouldings and profiles
- Stopped at 180–220 on anything being stained
Final Thoughts
Palm sanders are unglamorous and genuinely essential. They are not fast, and they will not strip a door, but they finish trim and reach corners that no round sander ever will.
Buy the DWE6411 for corners and detail work, the DWE6423 for flat surfaces and pre-stain prep. Then let both of them float instead of pressing down, and they will do exactly what you need.
🔧 What to read next: see dual action sanders for woodworking for the round-pad side of the story, and sanders for trim work for detailed joinery. Plan your grits with the grit progression planner.